
Setting up a Kubernetes cluster can seem like a mountain to climb, especially when you’re just starting out. However, having a local Kubernetes cluster is a fantastic way to get hands-on experience without worrying about cloud expenses. If you have a spare laptop sitting at home, this guide will help you turn it into a useful part of your Kubernetes home lab using k3s. Whether you’re using Linux, macOS, or Windows, this guide has got your back.
Prerequisites
1. Device Preparation:
- Number of Devices: You’ll need a minimum of two devices.
- Network Requirement: Ensure that both devices are connected to the same local area network (LAN), e.g., 192.168.1.xx.
- Network Configuration:
- Linux: Run
ip addrto find your network interfaces. - macOS: Use
ifconfigto view your network interfaces. - Windows: Execute
ipconfigto see your network setup.
- Linux: Run
2. Environment Preparation:
- Linux Users: You can proceed directly to the installation steps.
- macOS/Windows Users: A virtual environment setup is necessary before proceeding. Detailed instructions follow in the respective sections.
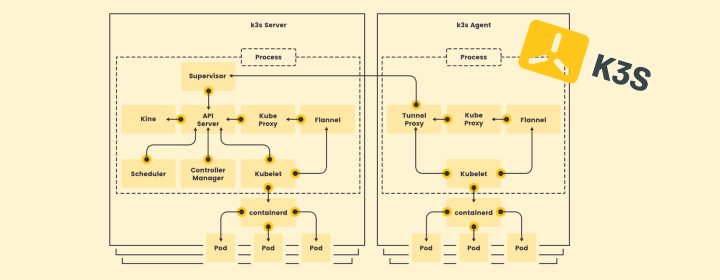
Installation for Linux
1. Install k3s Server
Pick the device with the highest specifications to run the k3s server (i.e., the control plane).
curl -sfL https://get.k3s.io | sh -
Executing this command will silently fetch and install the k3s server, making the process straightforward.
2. Verify Server is Up
To check if your server is up and running:
sudo systemctl status k3s

Verify the nodes:
sudo kubectl get nodes
Expected output:
NAME        STATUS   ROLES                  AGE
server-1    Ready    control-plane,master   10m
3. Get the Node Token (Save This)
Retrieve the node token for agent authentication:
sudo cat /var/lib/rancher/k3s/server/node-token
Example output:
K10a1d9c3b9a9e7a1a3f...::server:abcdef...
4. Install k3s Agent
curl -sfL https://get.k3s.io | \
K3S_URL=https://<SERVER-IP>:6443 \
K3S_TOKEN=<NODE-TOKEN> \
sh -
Replace:
<SERVER-IP>: This is your k3s server’s IP address.<NODE-TOKEN>: Insert the token you saved earlier.
5. Verify Agent
Ensure that the agent is active:
sudo systemctl status k3s-agent
6. Confirm Cluster State (on Server)
Verify the status of your cluster nodes:
kubectl get nodes -o wide

7. Sanity Checks
Check the core system pods to ensure everything is in order:
kubectl get pods -n kube-system

Uninstall k3s
Knowing how to clean up the k3s environment can come in handy for housekeeping or troubleshooting.
1. On the Worker Node: Stop and Remove Agent
sudo systemctl stop k3s-agent || true
sudo /usr/local/bin/k3s-killall.sh || true
sudo /usr/local/bin/k3s-agent-uninstall.sh || true
2. On the Master Node: Stop and Remove Server
sudo systemctl stop k3s || true
sudo /usr/local/bin/k3s-killall.sh || true
sudo /usr/local/bin/k3s-uninstall.sh || true
3. Manually Clean Leftovers
Conduct a thorough cleanup:
sudo rm -rf /etc/rancher /var/lib/rancher /var/lib/kubelet /etc/cni /opt/cni
Setup Node for macOS and Windows
Running k3s on macOS and Windows requires tackling a few hurdles. Avoid lightweight VM layers like Lima, as they don’t support bridged networking, which can limit access to services. Instead, opt for robust VM emulators.
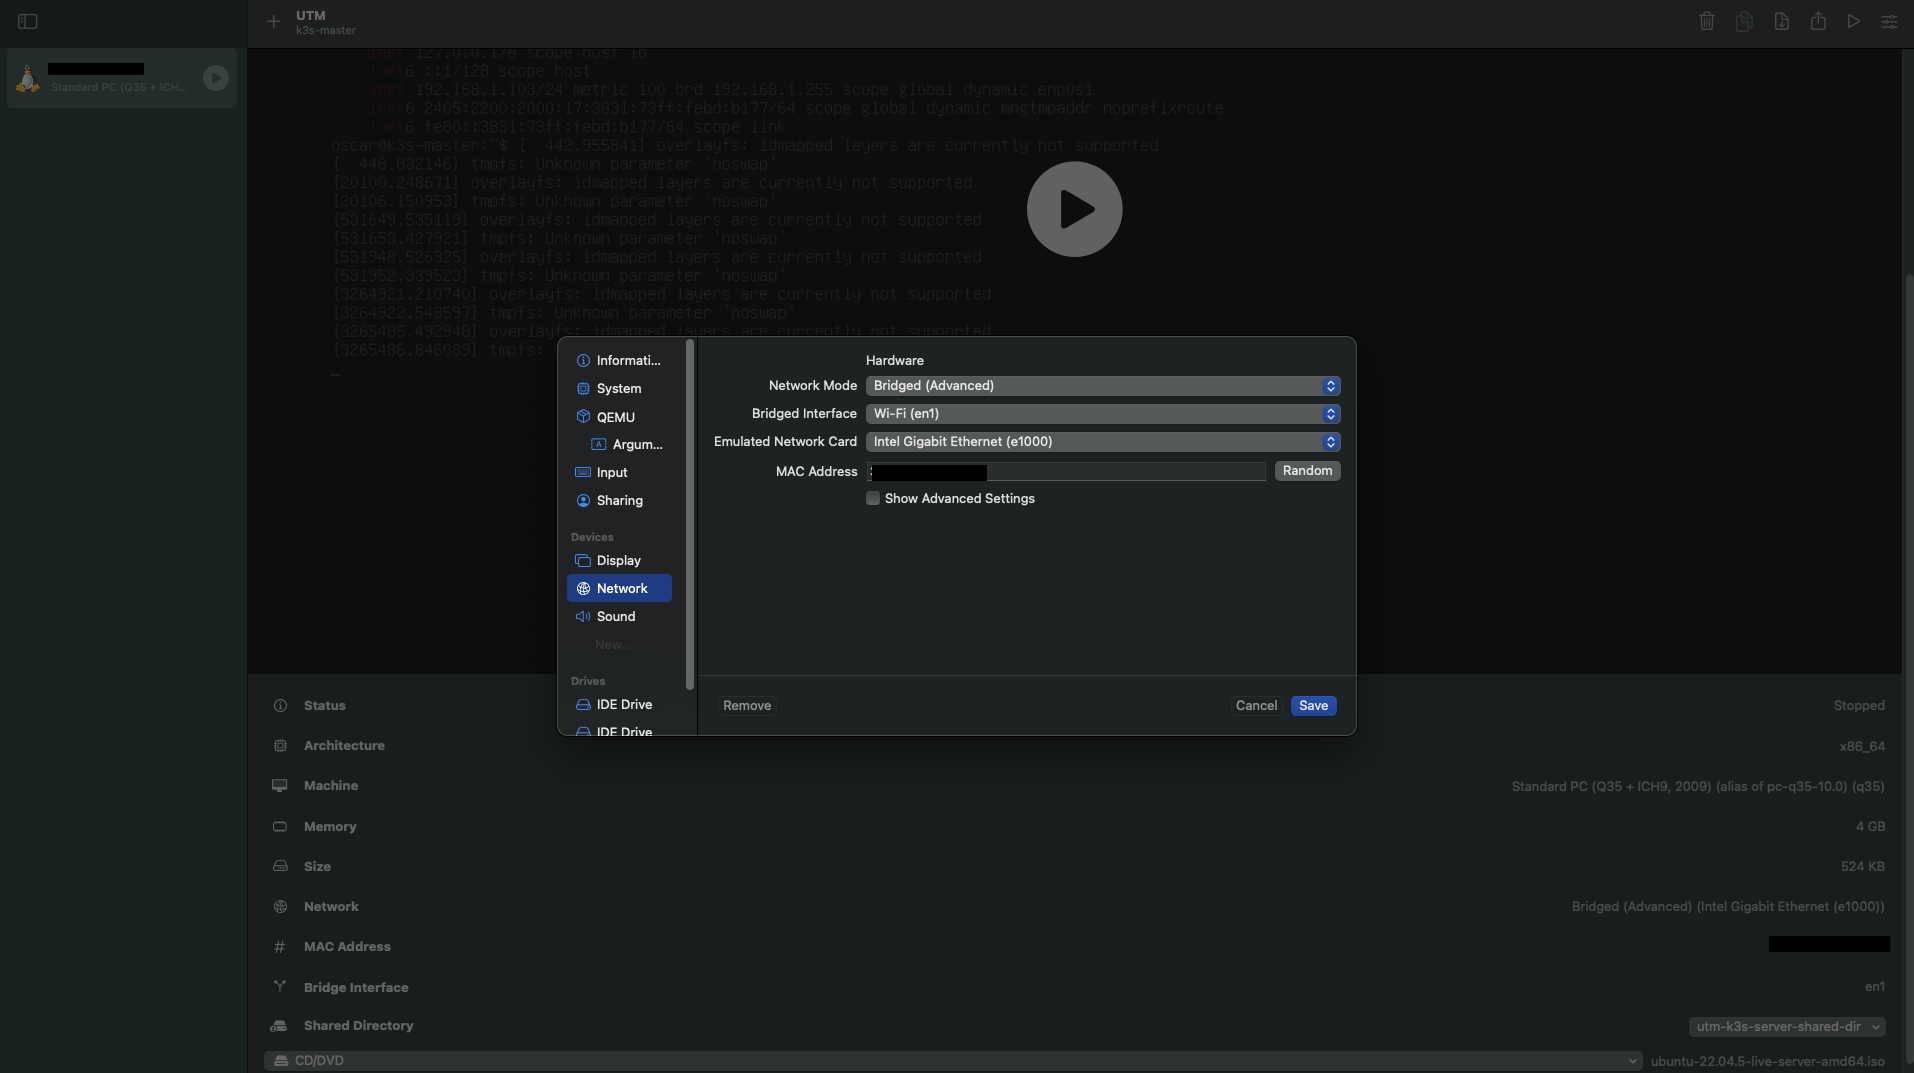
macOS Setup with UTM
-
Download and Install UTM: Download UTM from UTM.
-
Download Ubuntu Live Server: Download an Ubuntu live server image from Get Ubuntu Server.
-
Configure Bridged Networking in UTM: Navigate to the Network tab in UTM settings, select Bridged Adapter and choose your active network adapter.
Windows Setup with VirtualBox
-
Download and Install VirtualBox: Get VirtualBox from VirtualBox.
-
Install Ubuntu Live Server: Download the Ubuntu image as above.
-
Configure Bridged Networking in VirtualBox: Navigate to Network settings, choose Bridged Adapter, and select your active network adapter.
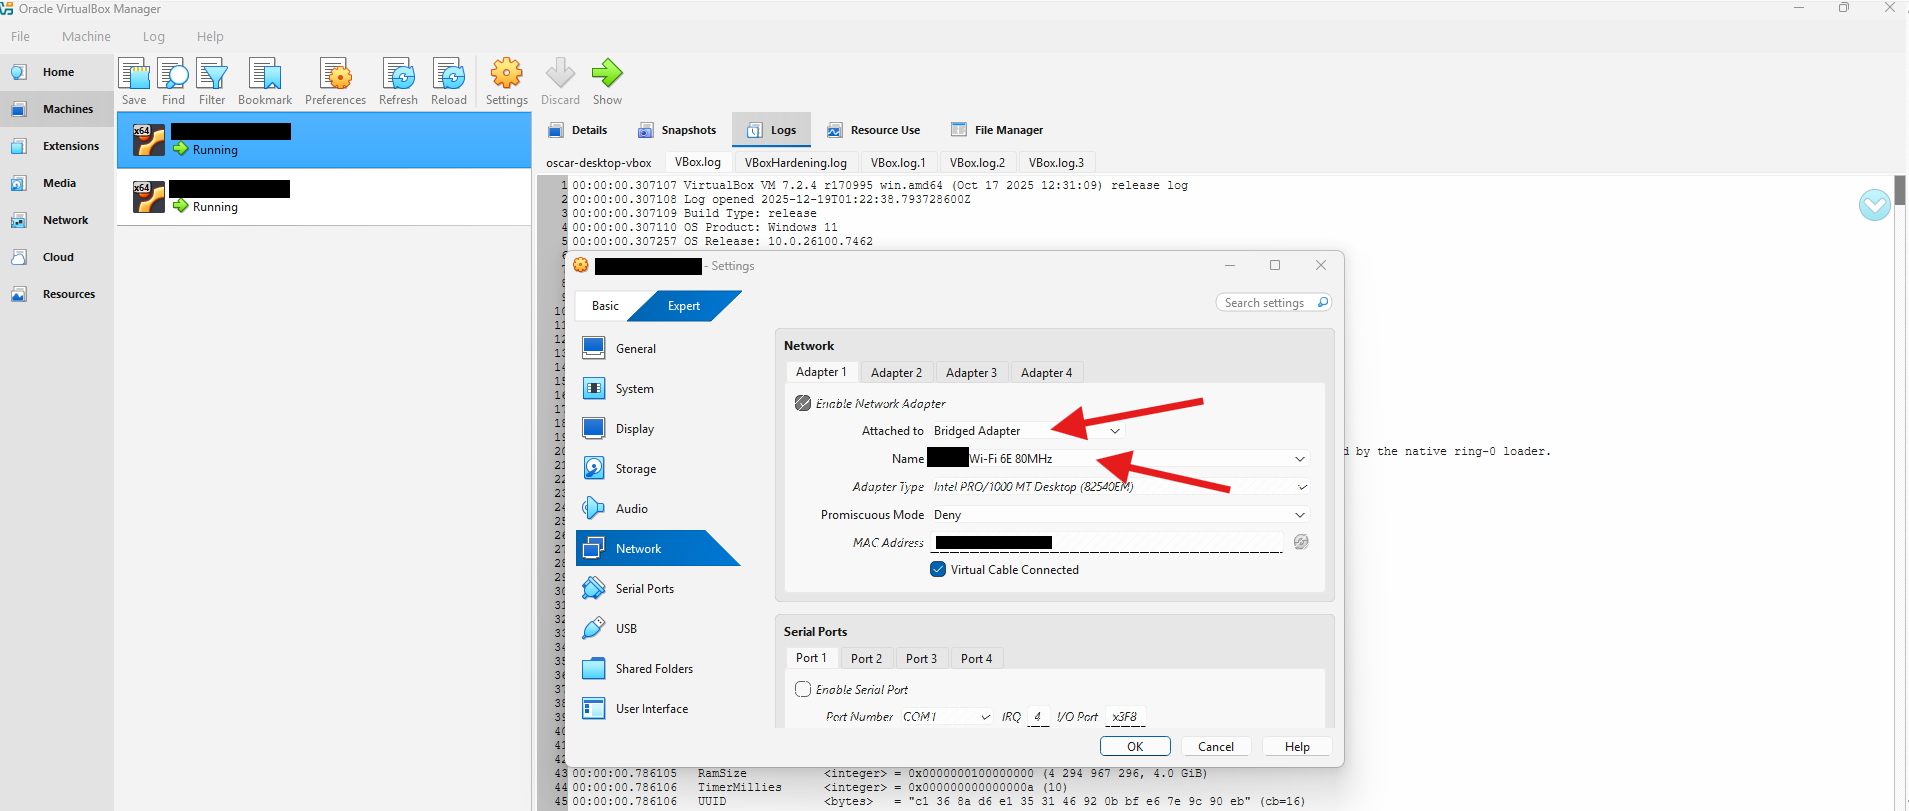
Select either:
- Wi-Fi: If connected wirelessly.
- Ethernet: If using a wired connection.
Troubleshooting Common Issues
- Failure to Start Services: Double-check all network configurations and restart the network service if needed.
- Node Not Joining Cluster: Verify the correctness of IP addresses and the node token.
- Network Issues in VMs: Ensure proper setup of bridged networking in your VM settings.
By following this guide step-by-step, you’ll be on your way to mastering Kubernetes through practical, hands-on experience. Happy clustering!
Enjoyed this article? Support my work with a coffee ☕ on Ko-fi.
