
Setup DroneCI Server and Runner for Github Repository (Compose File Takeaway)
Introduction
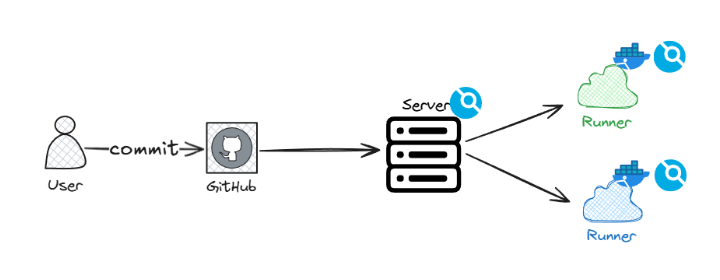
Self-hosting a CI/CD system is still a common requirement when you want more control over your build environment, runners, and infrastructure.
In this post, I’ll walk through how I set up DroneCI to work with GitHub repositories, using Docker Compose. Rather than covering every click in detail, the focus is on the key steps that actually matter during setup and the small but critical details that are easy to miss.
The goal is to give you a clear mental model of how the pieces fit together, so you can get a working setup quickly and avoid common mistakes.
Prerequisites
Before starting, make sure you have:
- A GitHub account
- Docker installed on the machine where you want to host DroneCI
- A domain name pointing to that machine (recommended)
Step 1: Create a GitHub OAuth App
DroneCI uses GitHub OAuth to authenticate users and access repositories.
-
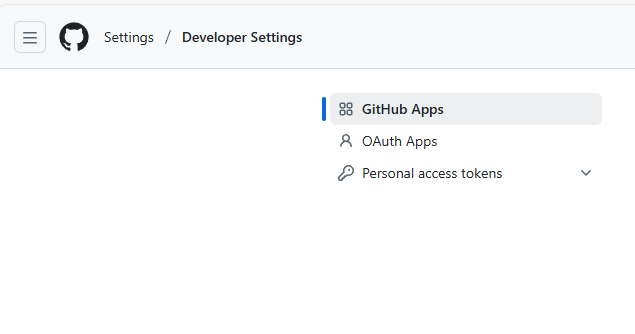
Log in to GitHub
Go to Settings from your profile avatar, then open Developer settings in the left sidebar.
-
Open OAuth Apps and click New OAuth App
-
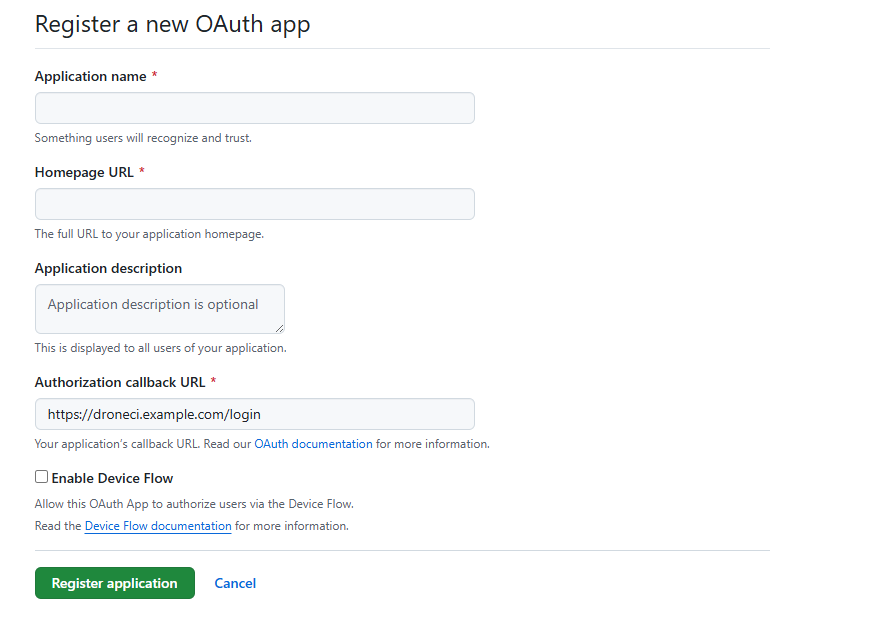
Fill in the OAuth App details
-
Application name: anything meaningful
-
Homepage URL: any valid URL (this is not critical)
-
Authorization callback URL:
❗ This is the important one. It must be your DroneCI URL with/loginappended.Example:
- DroneCI URL:
https://droneci.example.com - Callback URL:
https://droneci.example.com/login
If you are not using TLS, use
httpinstead ofhttps. - DroneCI URL:
-
-
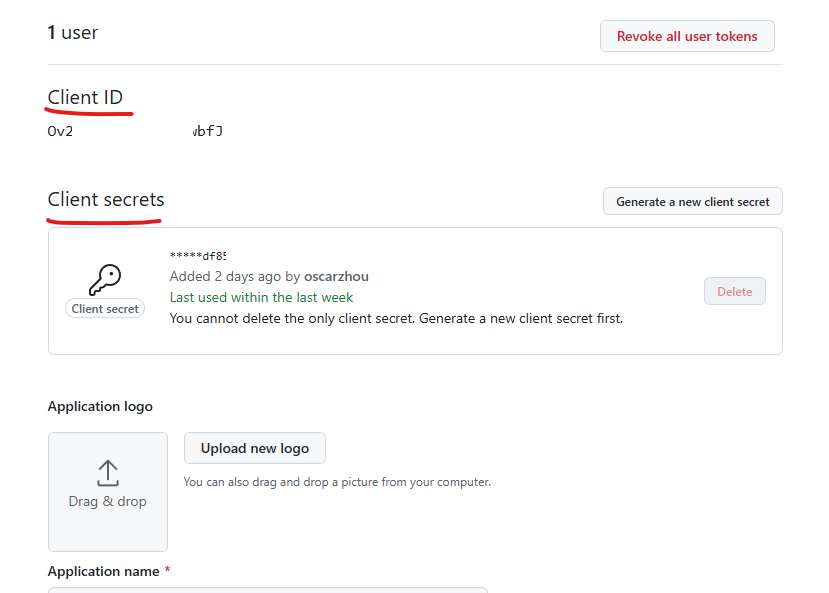
Save the Client ID and Client Secret
After creating the app, GitHub will show:- Client ID
- Client Secret (generate one)
Store both values securely. You will need them when configuring DroneCI.
Step 2: Deploy DroneCI Server and Runner
You can deploy DroneCI using plain Docker Compose, but using Portainer makes the process much easier.
If you have not used it before, Portainer Business Edition allows up to 3 free nodes and is worth checking out. By the way, Portainer Community Edition also works fine and it’s open source.
Below is an example Docker Compose setup using Traefik as the reverse proxy. Adjust labels, networks, or proxy configuration as needed for your environment.
 1version: "3.3"
 2
 3services:
 4  drone_server:
 5    image: drone/drone:2
 6    container_name: drone_server
 7    restart: always
 8    networks:
 9      - proxy
10    environment:
11      - DRONE_GITHUB_CLIENT_ID=${DRONE_GITHUB_CLIENT_ID}
12      - DRONE_GITHUB_CLIENT_SECRET=${DRONE_GITHUB_CLIENT_SECRET}
13      - DRONE_SERVER_HOST=${DRONE_SERVER_HOST}
14      - DRONE_RPC_SECRET=${DRONE_RPC_SECRET}
15      - DRONE_SERVER_PROTO=${DRONE_SERVER_PROTO}
16      - DRONE_USER_CREATE=${DRONE_USER_CREATE} # Important
17      - DRONE_LOGS_DEBUG=true
18      - DRONE_LOGS_TRACE=true
19    labels:
20      - traefik.enable=true
21      - traefik.http.routers.drone.tls=true
22      - traefik.http.routers.drone.tls.certresolver=leresolver
23      - traefik.http.routers.drone.rule=Host(`drone.example.com`)
24      - traefik.http.routers.drone.service=drone
25      - traefik.http.services.drone.loadbalancer.server.port=80
26      - traefik.http.routers.drone.entrypoints=websecure
27    volumes:
28      - /var/lib/drone:/data
29
30  drone_runner:
31    image: drone/drone-runner-docker:latest
32    container_name: drone-runner
33    restart: always
34    depends_on:
35      - drone_server
36    environment:
37      - DRONE_RPC_HOST=${DRONE_RPC_HOST}
38      - DRONE_RPC_PROTO=${DRONE_RPC_PROTO}
39      - DRONE_RPC_SECRET=${DRONE_RPC_SECRET}
40      - DRONE_RUNNER_CAPACITY=${DRONE_RUNNER_CAPACITY}
41      - DRONE_RUNNER_NAME=${DRONE_RUNNER_NAME}
42      - DRONE_RUNNER_LABELS=${DRONE_RUNNER_LABELS}
43    volumes:
44      - /var/run/docker.sock:/var/run/docker.sock
45
46networks:
47  proxy:
48    external: true
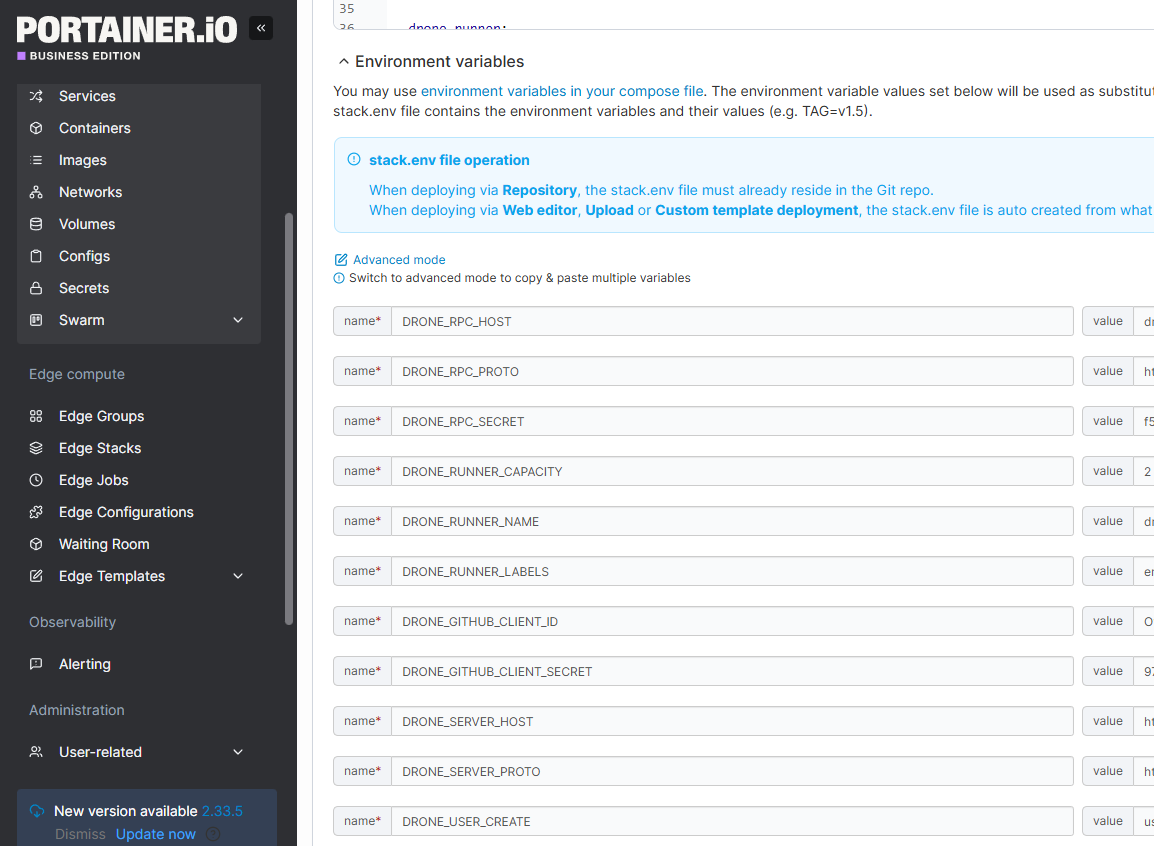
Key Drone Server Environment Variables (Lines 11-18)
-
DRONE_GITHUB_CLIENT_ID: GitHub OAuth Client ID -
DRONE_GITHUB_CLIENT_SECRET: GitHub OAuth Client Secret -
DRONE_SERVER_HOST: Your DroneCI domain, for example:drone.example.com. -
DRONE_SERVER_PROTO:httpsorhttp -
DRONE_RPC_SECRET: A shared secret used by the server and runners. You can generate a random string for this. -
DRONE_USER_CREATE: ❗ This is critical for first-time setup. You can follow the format:username:<github_username>,admin:true. For example, my Github account ishttps://github.com/oscarzhou, so I set:username:oscarzhou,admin:true. Without this, you may lock yourself out of admin access.
Key Drone Runner Environment Variables (Lines 37-42)
-
DRONE_RPC_HOST: Same asDRONE_SERVER_HOST(without protocol) -
DRONE_RPC_PROTO:httpsorhttp -
DRONE_RPC_SECRET: Must match the server value -
DRONE_RUNNER_CAPACITY: Number of concurrent pipelines this runner can execute (minimum 1) -
DRONE_RUNNER_NAME: Any recognizable name for this runner -
DRONE_RUNNER_LABELS: Used to target specific runners in.drone.yml. For example:environment:production. This allows you to decide which runner executes which workflow. If you have separate runners for production and staging, you can label them accordingly, for example: production label can beenvironment:production, and staging label can beenvironment:staging. Then in your.drone.yml, you can specify which runner to use based on these labels.
If you deploy using Portainer, you can paste the Compose file into a Stack and configure these variables directly in the UI.
Step 3: Configure a GitHub Repository in DroneCI
Once the services are running, open: https://drone.example.com.
On first login, DroneCI will prompt you to complete Username and Company name. Use your GitHub username for consistency. Use any value for Company name.
You will also be asked to authorize GitHub access. This is expected. DroneCI needs permission to read your repositories and webhooks.

Configure a Repository
After login:
- Select a repository you want to integrate
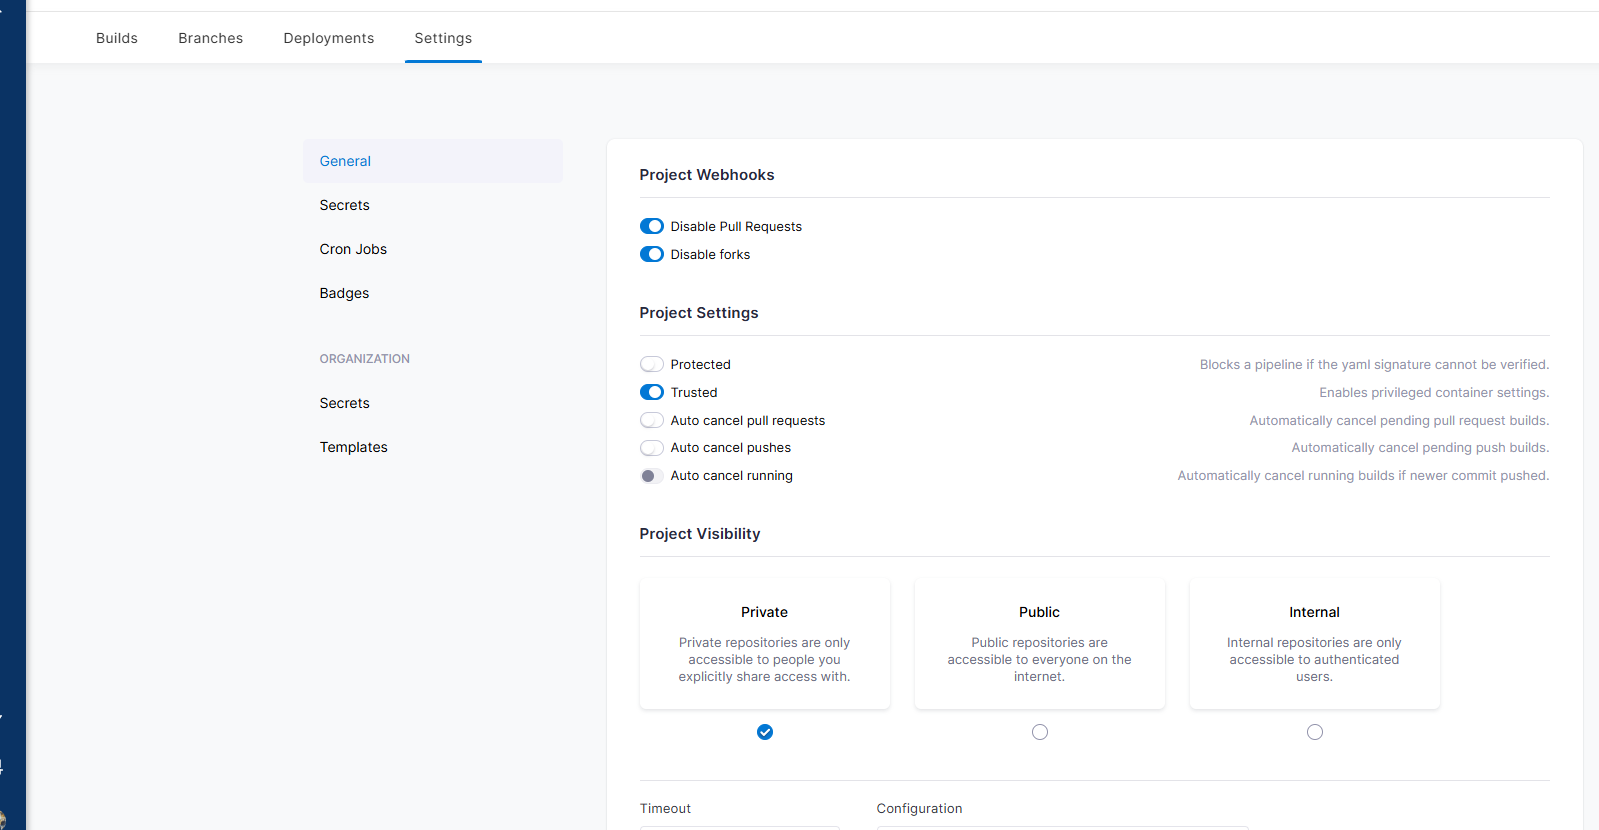
- Open the Settings tab
Important settings to review:
- Trusted
Enable this if your pipeline builds Docker images. Without it, Docker builds will fail. - Configuration file name
DroneCI will only trigger pipelines if the filename matches exactly. Example:
.drone.yml      ✓ works
.drone.yaml     ✗ will not trigger if the UI expects .yml
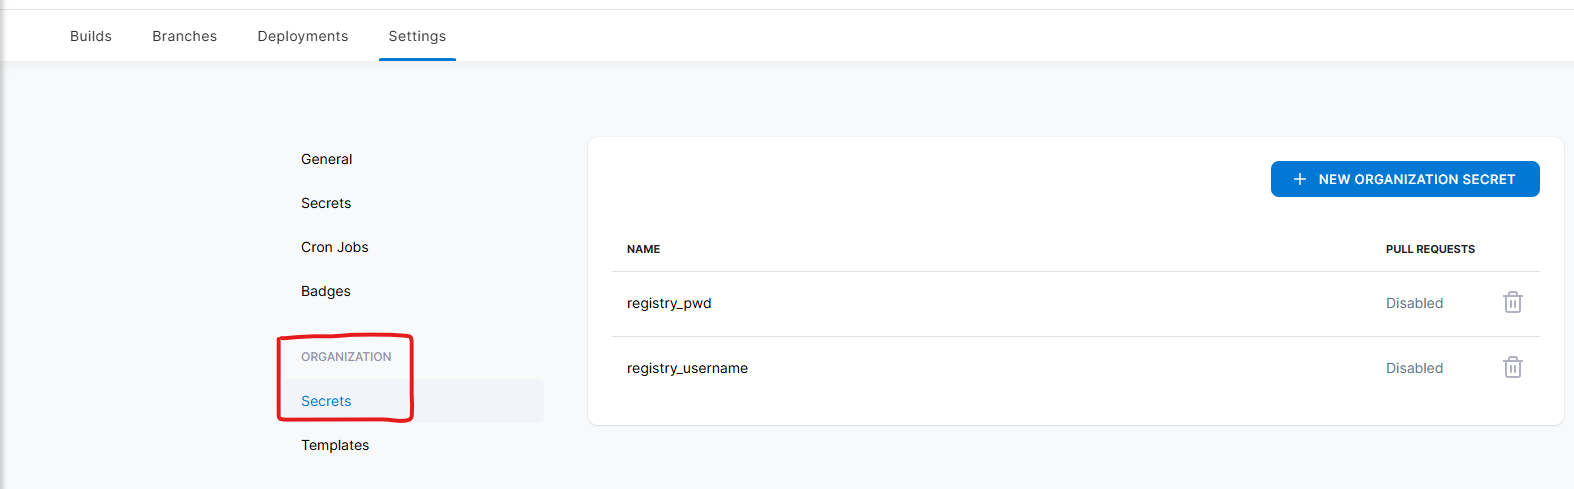
Secrets and Registry Credentials
If you use a private container registry, consider adding credentials under Organization Secrets. This avoids duplicating secrets across repositories.
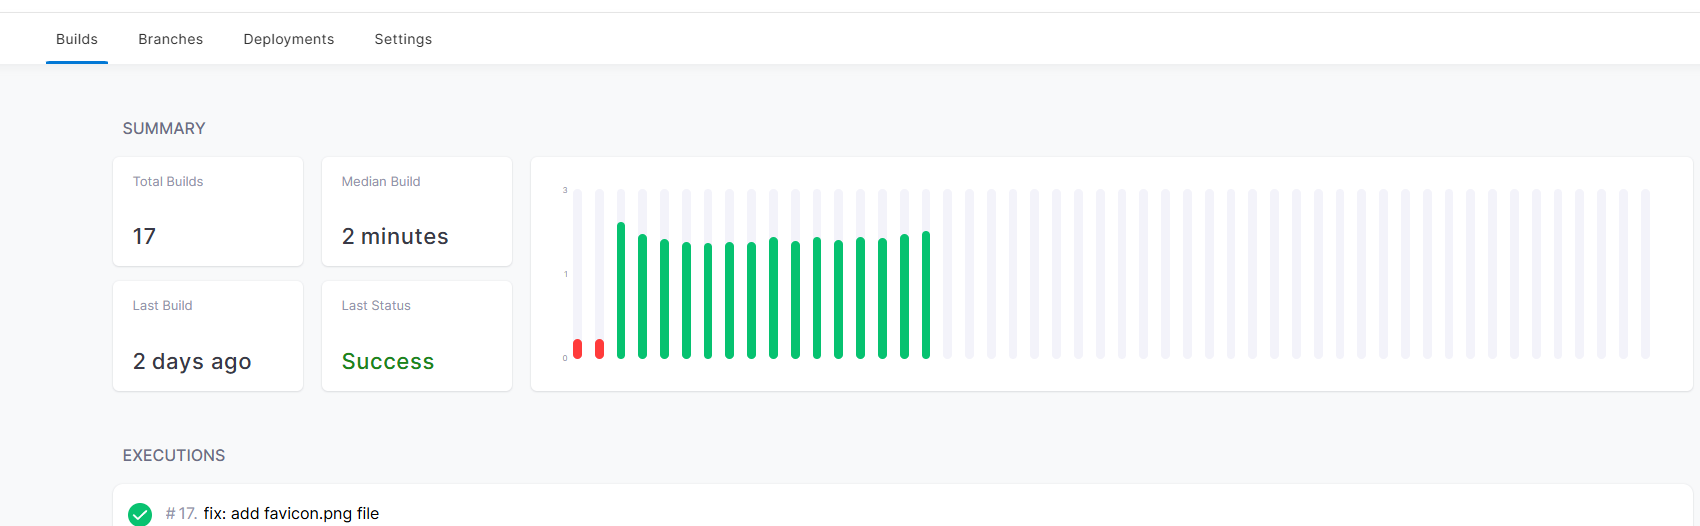
Build Status Badge
DroneCI provides a build status badge that you can embed in README.md. It is a simple but useful way to monitor build status directly from GitHub.
![]()
Example .drone.yml
This post does not go deep into DroneCI pipeline syntax. I have a separate post that explains it in detail.
For completeness, here is a simplified workflow:
- Build a Docker image on a specific runner
- Push the image to a private registry
- Send build notifications to Slack
- Trigger service redeployment (for example, via Portainer)
---
kind: pipeline
ype: docker
name: build-deploy

volumes:
- name: dockersock
  host:
    path: /var/run/docker.sock

platform:
  os: linux
  arch: amd64

steps:
- name: build-and-push-image
  image: plugins/docker
  volumes:
  - name: dockersock
    path: "/var/run/docker.sock"
  settings:
    username:
      from_secret: registry_username
    password:
      from_secret: registry_pwd
    repo: <dockerhub user>/<repo>
    tags:
    - latest
    dockerfile: build/Dockerfile

node:
  environment: production

rigger:
  branch:
  - main
  event:
    exclude:
    - pull_request
Notes:
registry_usernameandregistry_pwdcome from DroneCI secretsnode: environmentmatchesDRONE_RUNNER_LABELS- Labels allow fine-grained control over which runner executes the pipeline
Key Takeaways
- GitHub OAuth callback URL must end with
/login DRONE_USER_CREATEmust be set correctly to create an admin user- Enable Trusted if your pipeline builds Docker images
- DroneCI only triggers pipelines if the config filename matches exactly
Background: Why I Came Back to DroneCI
Over the past few years, I have written several posts about self-hosted CI/CD solutions, including GitHub Actions runners and DroneCI.
Earlier on, I relied heavily on self-hosted Gitea. At the time, Gitea did not support GitHub Actions-style runners, so DroneCI became my primary self-hosted CI/CD platform.
More recently, as I moved more personal projects back to GitHub, GitHub Actions felt like the natural choice. I started using self-hosted GitHub runners again.
However, there is a limitation that becomes obvious once you work with multiple repositories: self-hosted GitHub runners are configured per repository.
You cannot easily register a single runner and reuse it across all repositories under the same GitHub account.
Once that setup became harder to maintain, I wanted a CI/CD system that I could deploy once and reuse across all repositories. That requirement naturally led me back to DroneCI.
This post exists to document that setup, not as a tutorial, but as a set of practical takeaways that help connect the dots and avoid common mistakes.
Enjoyed this article? Support my work with a coffee ☕ on Ko-fi.
