

Introduction
Hosting a static website on Linode Object Storage is possible, but integrating it with a custom domain and enabling HTTPS can be tricky due to certain limitations. In this guide, I’ll walk you through the challenges I faced while setting up a static website for a client and the solutions I implemented to make it work.
The Challenges ⚠️
- Client’s DNS Management in Linode: Since the client’s DNS is managed within Linode, switching to an external service like Cloudflare wasn’t an option.
- Linode Object Storage Only Supports CNAME: While I could point
www.domain.comto Linode Object Storage, the root domain (domain.com) could only resolve to an IP address, not a CNAME. - Limited TLS Support: Linode Object Storage doesn’t automatically handle HTTPS for custom domains, requiring a manual setup for TLS certificates.
- No Cloudflare CDN: Due to Linode DNS restrictions, I couldn’t use Cloudflare to improve performance and security.
The Solution 🛠️
To overcome these limitations, I set up a workaround using a reverse proxy with Let’s Encrypt TLS certificates.
1. Create Linode Object Storage Bucket with the Correct Name
If you need to set HTTPs for custom domain, you need to create a bucket with the same name as your domain. For example, the bucket name: www.domain.com
2. Configure HTTPS for www.domain.com
Linode Object Storage allows you to upload SSL/TLS certificates. Here’s how I did it:
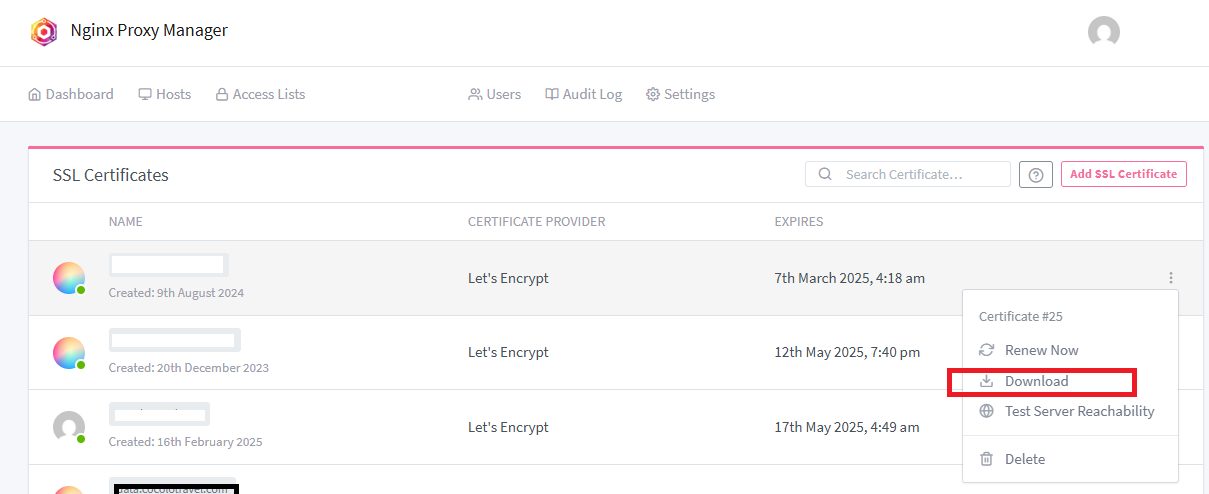
- Generate a TLS Certificate with Let’s Encrypt:
You can use Certbot or Nginx Proxy Manager to generate a certificate. I used Ngixn Proxy Manager for simplicity.
Add CNAME record for www.domain.com pointing to Linode Object Storage www.domain.com.jp-osa-1.linodeobjects.com.
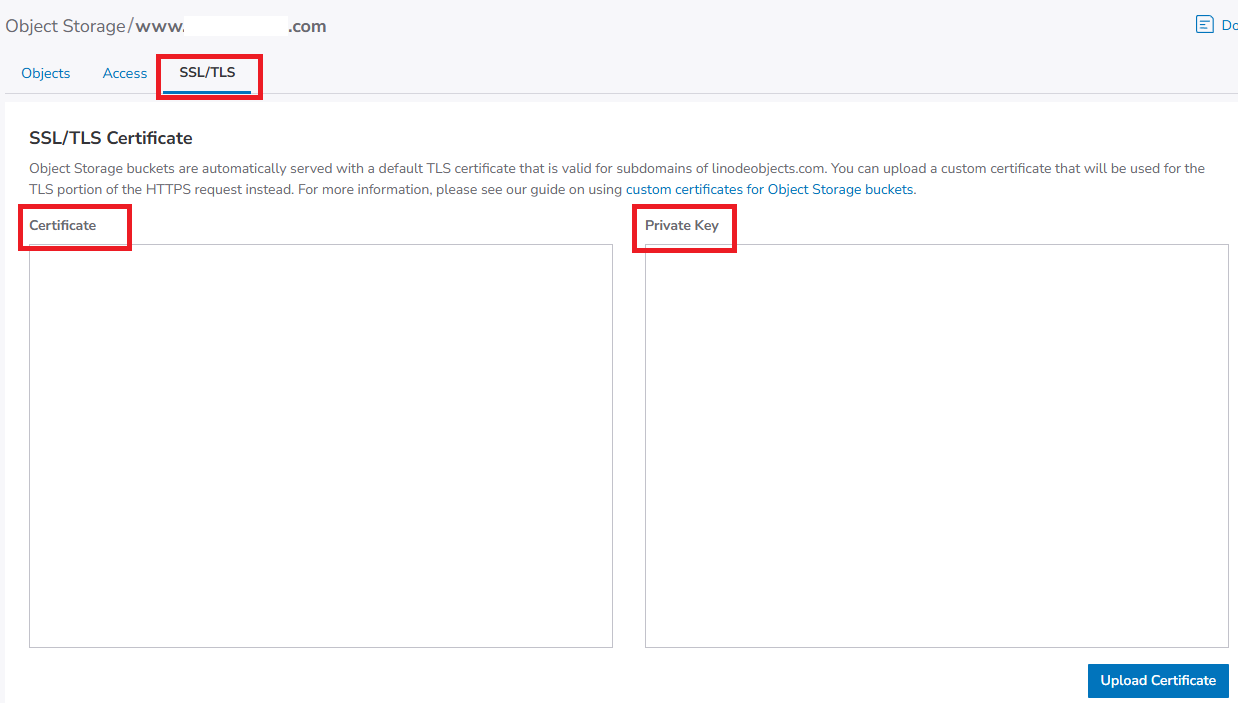
- Upload the Certificate to Linode Object Storage:
- Navigate to Linode Object Storage settings.
- Upload the generated certificate and private key.
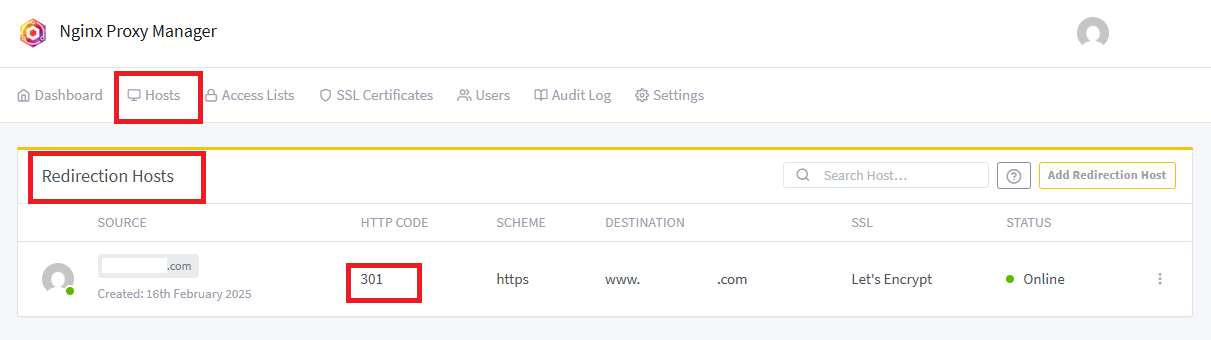
3. Redirect domain.com to www.domain.com
Since the root domain can’t use a CNAME, I used a reverse proxy hosted on an existing VPS.
-
Set Up an A Record for the VPS:
- Point
domain.comto the VPS IP address in Linode DNS.
- Point
-
Configure Reverse Proxy:
If you use Nginx Proxy Manager, create a redirection host fordomain.comand set it to forward requests towww.domain.com.
The Final Setup
www.domain.compoints to Linode Object Storage via CNAME and supports HTTPS.domain.compoints to a VPS running a reverse proxy that forwards requests towww.domain.com.- Both domains now work over HTTPS, ensuring a secure connection for visitors.

A Better Alternative: Netlify
While this workaround solves the issue, it’s not the best practice. The lack of a CDN still affects performance. A better solution is Netlify, which:
- Provides a built-in CDN.
- Doesn’t require changing nameservers in Linode DNS.
- Makes HTTPS setup seamless.
If your project allows flexibility, consider using Netlify for static hosting instead of Linode Object Storage. However, if you’re bound by constraints like mine, this guide should help you get your static site running securely.
Conclusion 👍
Setting up TLS and DNS for Linode Object Storage with a custom domain requires a bit of effort, but with a reverse proxy and Let’s Encrypt, you can make it work. However, if possible, consider migrating to Netlify for an easier and more efficient solution.
Have you faced similar challenges? Let me know in the comments!
Enjoyed this article? Support my work with a coffee ☕ on Ko-fi.
