
1. Introduction
In this tutorial, we will walk through the steps to create a local Kubernetes cluster with TLS certificates configured. This setup ensures secure communication between your Kubernetes components.
2. Prerequisites
- Docker installed on your local machine
- kubectl installed
- kind installed
- OpenSSL installed for generating TLS certificates
3. Install kubectl (Ubuntu)
curl -LO "https://dl.k8s.io/release/$(curl -L -s https://dl.k8s.io/release/stable.txt)/bin/linux/amd64/kubectl"
chmod +x kubectl
sudo mv kubectl /usr/local/bin/
Verify the Installation
You can verify the installation by running the following command:
kubectl version --client
4. Install kind (Kubernetes IN Docker)
Take Ubuntu as an example
curl -Lo ./kind https://kind.sigs.k8s.io/dl/latest/kind-linux-amd64
chmod +x ./kind
sudo mv ./kind /usr/local/bin/kind
Verify the Installation
You can verify the installation by running the following command:
kind --version
Create a Kind cluster
Run the following command to create a Kubernetes cluster:
kind create cluster
Query the kubeconfig File
kind get kubeconfig
We can see the output like this:
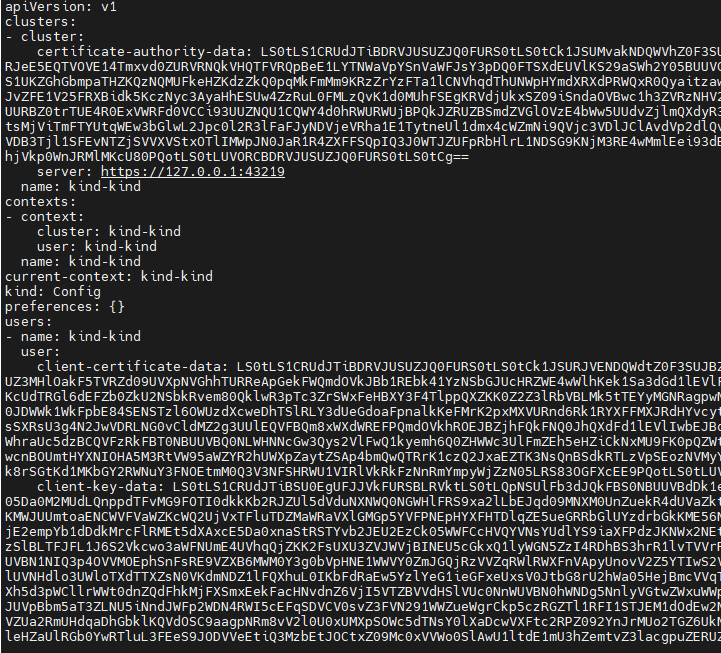
It shows that there are already TLS certificates configured in the kubeconfig file. It is because kind uses TLS by default for securing the API server and internal components. It generates self-signed certificates and manages them internally. But we always can override these certificates with our own certificates.
5. Create Local Kubernetes Cluster with Custom TLS Certificates
Generate Custom TLS Certificates
Use OpenSSL to generate the TLS certificates required for the Kubernetes API server.
mkdir tls-certs && cd tls-certs
openssl genrsa -out ca.key 2048
openssl req -x509 -new -nodes -key ca.key -subj "/CN=kind-ca" -days 365 -out ca.crt
openssl genrsa -out server.key 2048
openssl req -new -key server.key -subj "/CN=kind-cluster" -out server.csr
openssl x509 -req -in server.csr -CA ca.crt -CAkey ca.key -CAcreateserial -out server.crt -days 365
After running the above commands, you will have the following files in the tls-certs directory:
ca.key: CA private keyca.crt: CA certificateserver.key: Server private keyserver.csr: Server certificate signing requestserver.crt: Server certificateca.srl: CA serial number
Create a Kind Cluster with Coustom Config
Create a configuration file (kind-config.yaml) for your Kind cluster. This file will define the cluster settings, including the API server’s TLS configuration.
# kind-config.yaml
kind: Cluster
apiVersion: kind.x-k8s.io/v1alpha4
nodes:
  - role: control-plane
    extraMounts:
      - hostPath: ./tls-certs
        containerPath: /etc/kubernetes/pki
Create the cluster:
kind delete cluster
kind create cluster --config kind-config.yaml
Now, if you list the .tls/certs directory, you will see more files generated by Kind.
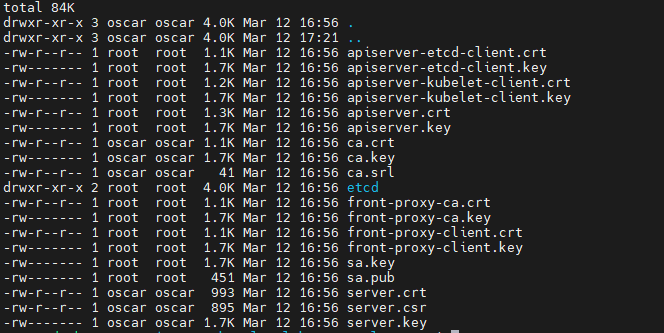
These files are the default certificates generated by Kind. If you are interested what they are, you can check my other post here.
Deploy the Custom TLS Certificates in Kubernetes
After creating the Kind cluster, you need to store the TLS certificates inside Kubernetes so services can use them for secure communication. This is done using a Kubernetes Secret of type tls.
kubectl create secret tls kind-tls-secret \
  --cert=./tls-certs/server.crt \
  --key=./tls-certs/server.key
Verify the secret with Portainer
Now we have a local Kubernetes cluster with custom TLS certificates configured. We can test by installing a sample application. Let’s do it with Portainer.
Run up the Portainer server and expose the service with NodePort.
kubectl apply -n portainer -f https://downloads.portainer.io/ee-lts/portainer.yaml
Verify the deployment:
kubectl get svc -n portainer

You can see the Portainer service is correctly configured as a NodePort type with:
- Internal port 9000 mapped to NodePort 30777 (HTTP)
- Internal port 9443 mapped to NodePort 30779 (HTTPS)
- Port 30776 mapped to 30776 (Edge Agent tunnel port)
The
for EXTERNAL-IP is expected for NodePort services, especially in local environments like Kind. NodePort services don’t get assigned an external IP - instead, they’re accessible via the node’s IP address on the specified NodePort.
For Kind clusters specifically, accessing NodePorts requires special handling because Kind runs in Docker containers. The most reliable method is to use Port Forwarding to access the service.
kubectl port-forward svc/portainer -n portainer 9443:9443
Then access Portainer at https://localhost:9443
Note: If you couldn’t access it within the first 5 minutes, you need to restart the service.
kubectl -n portainer rollout restart deployment.apps/portainer
This is necessary because Portainer stops listening if an administrator user isn’t created within 5 minutes of installation
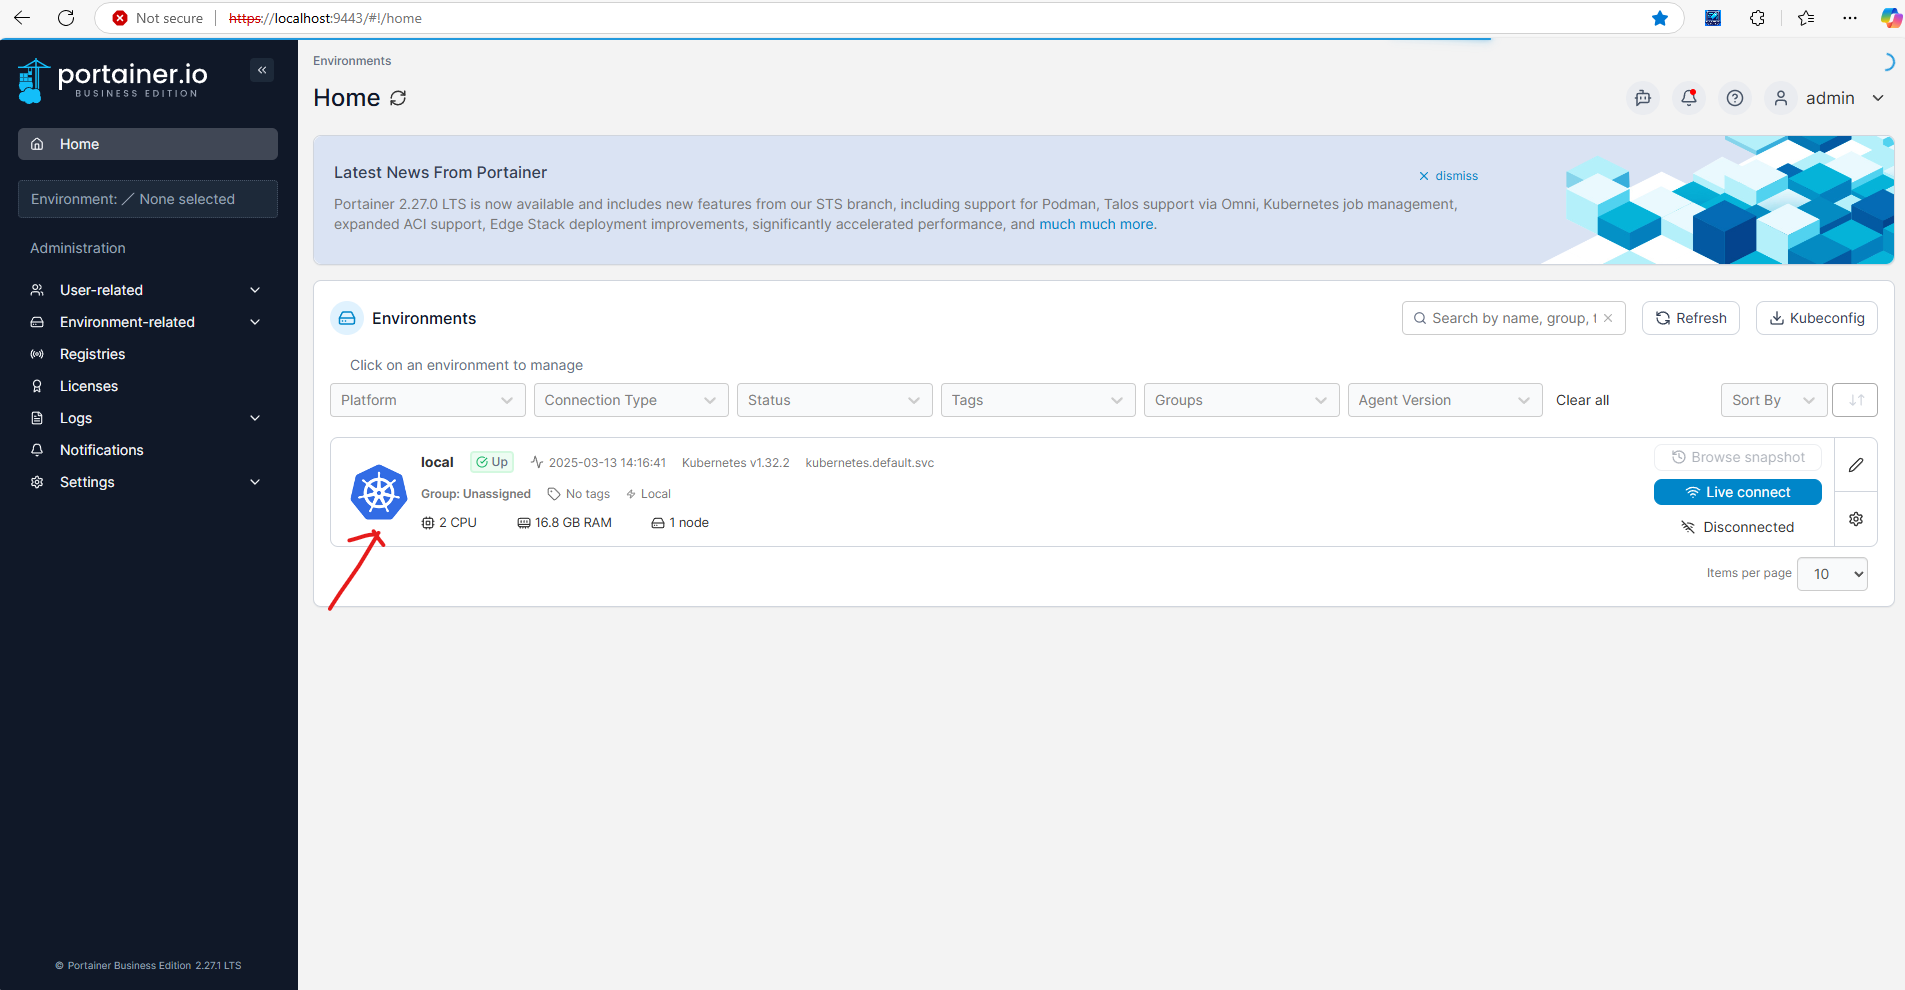
Okay, now we can verify the TLS certificates in the Portainer dashboard.
Click the local cluster
Navigate to the ConfigMaps & Secrets on the left sidebar, you will see the kind-tls-secret secret we created earlier.
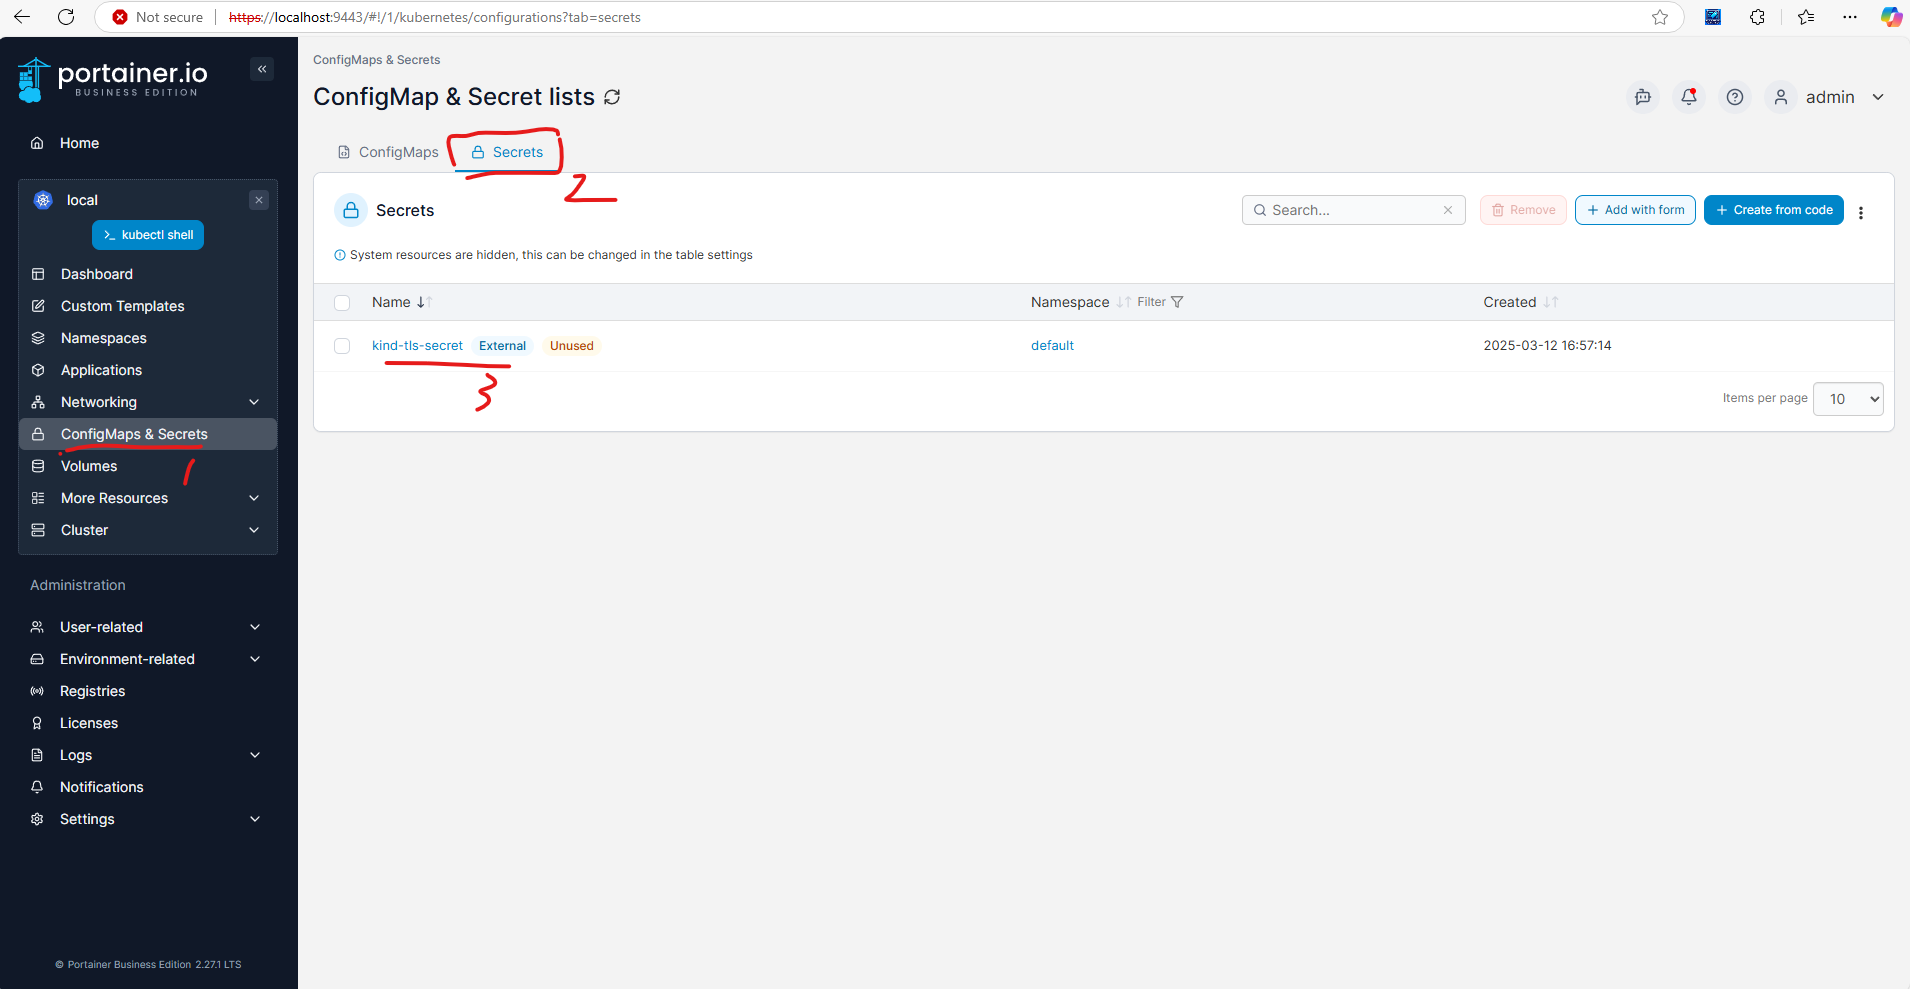
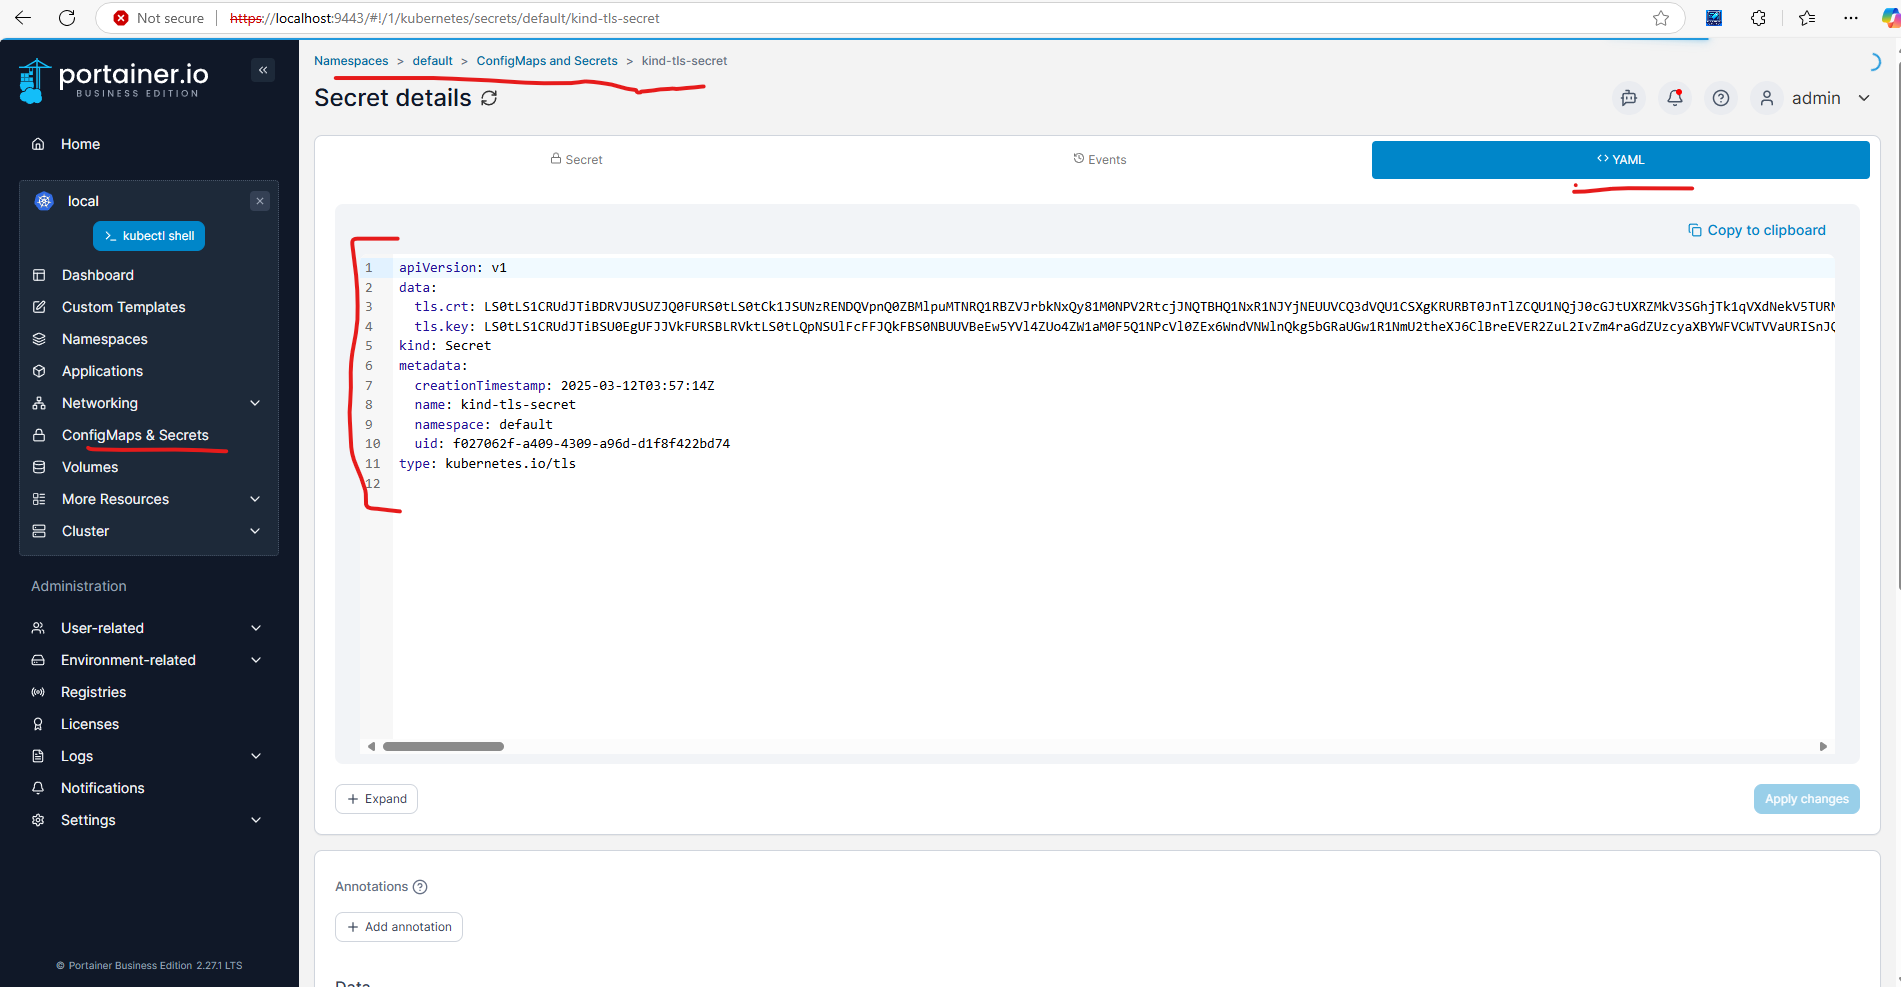
Click the secret to view the details. You can see the certificate and key data in YAML tab.
Verify the secret with command:
To check if the secret was created successfully, run:
kubectl get secret kind-tls-secret
To see more details about the stored certificate:
kubectl get secret kind-tls-secret -o yaml
You’ll see a base64-encoded version of the server.crt and server.key:
apiVersion: v1
data:
  tls.crt: LS0tLS1CRUdJTiBDRVJUSUZJQ0FURS0tLS0t...
  tls.key: LS0tLS1CRUdJTiBSUklWQVRFIEtFWS0tLS0t...
kind: Secret
metadata:
  name: kind-tls-secret
type: kubernetes.io/tls
Conclusion
You have successfully created a local Kubernetes cluster with TLS certificates configured. This setup ensures secure communication between your Kubernetes components.
Enjoyed this article? Support my work with a coffee ☕ on Ko-fi.
