

Setting up a self-hosted GitHub Runner on a DigitalOcean droplet allows for more control and customization in your CI/CD pipelines. This guide walks you through creating a droplet using a Docker image, configuring GitHub secrets, and setting up a self-hosted runner in a few easy steps.
1. Setup DigitalOcean Droplet
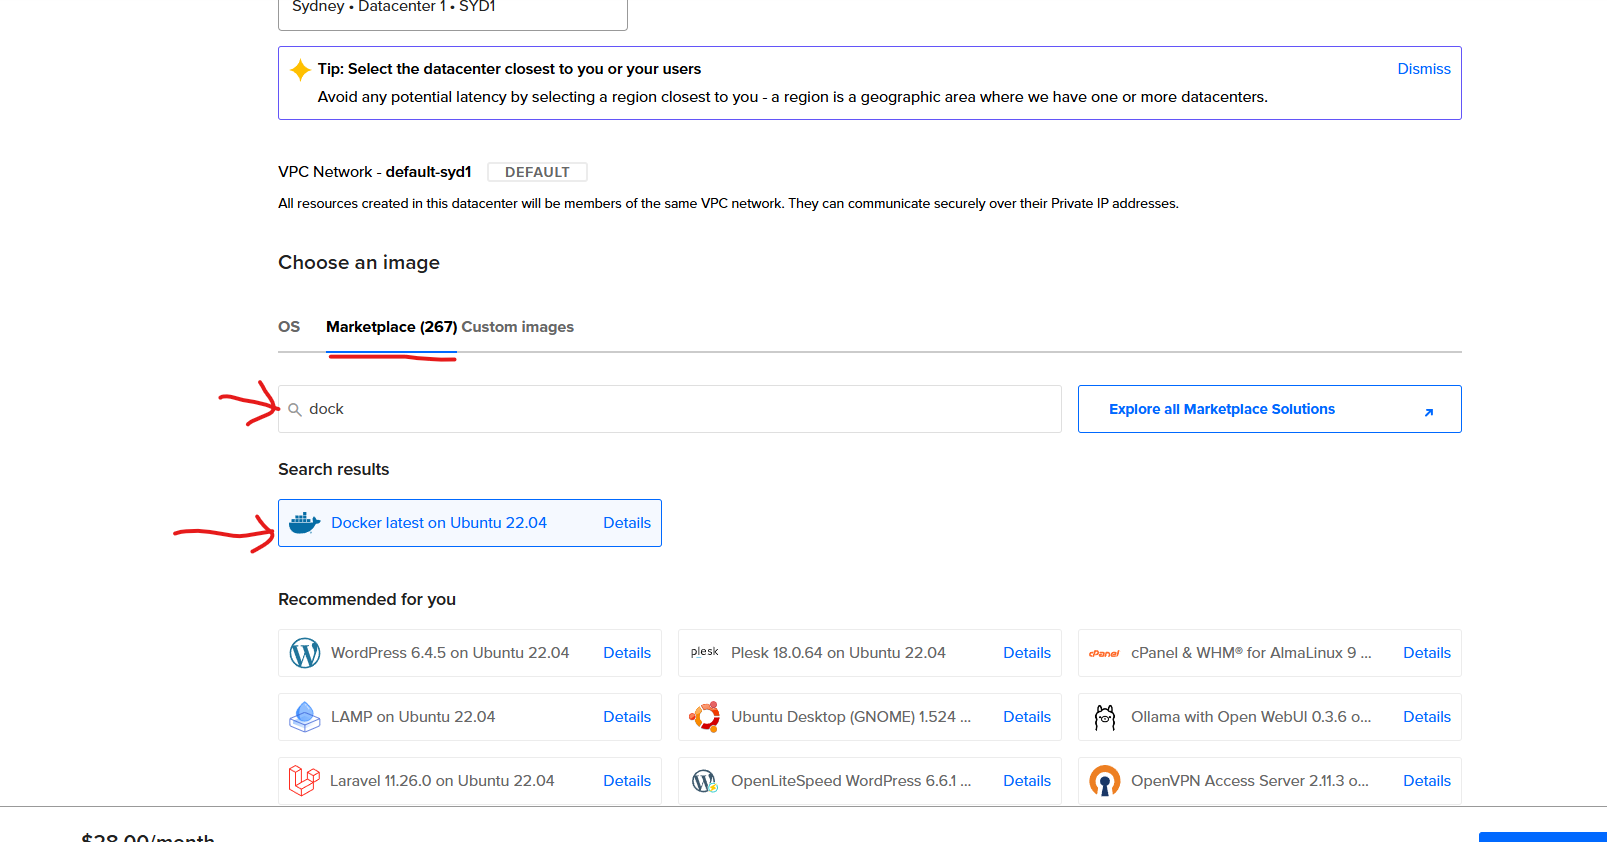
1.1 Create a DigitalOcean Droplet
Start by creating a droplet from the DockerImage marketplace on DigitalOcean. This pre-configured image includes Docker, so you won’t need to install it yourself.
Choose a secure password for SSH access and save it somewhere safe.
1.2 Configure GitHub Repository Secrets
Navigate to your GitHub repository and open the settings tab. Under Secrets and variables → Actions, add a new repository secret.

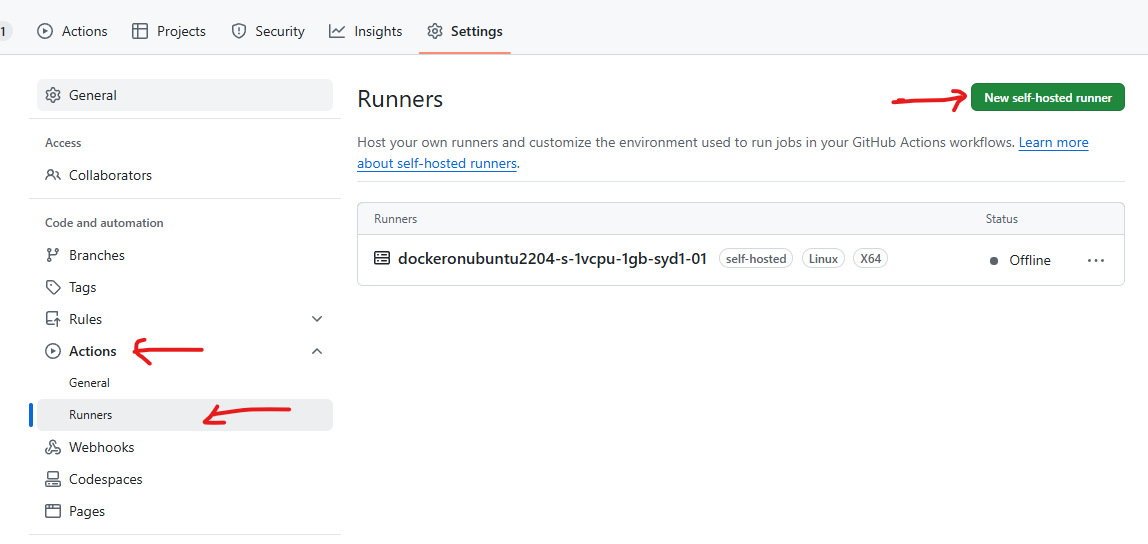
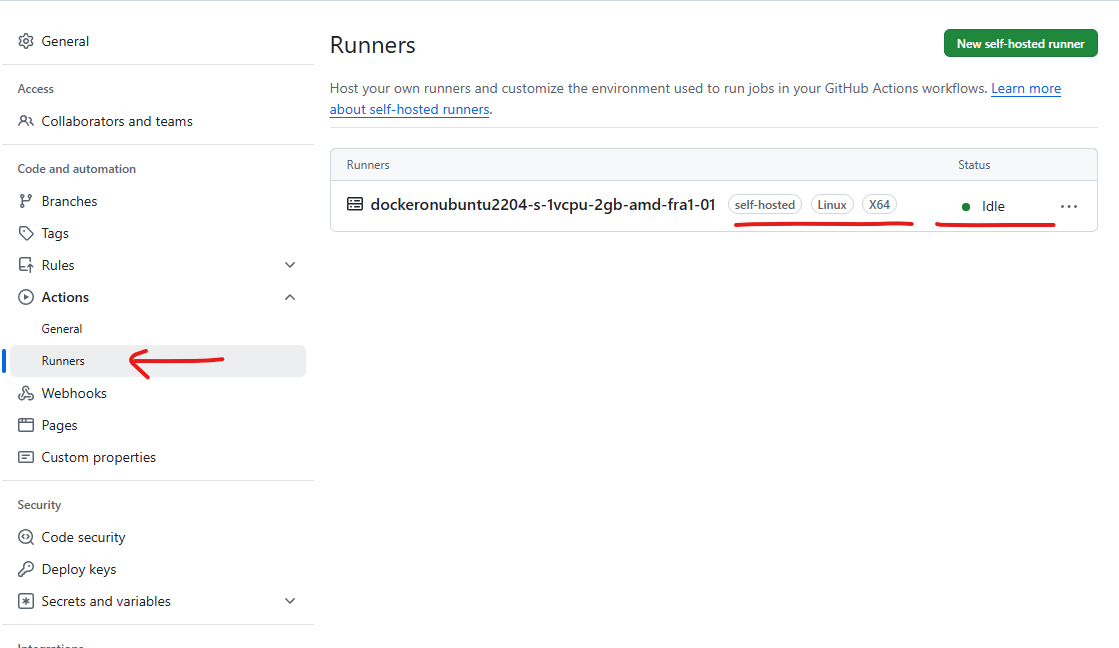
2. Configure GitHub Action Runner
In GitHub, go to Actions → Runners and set up a new self-hosted runner. Select Linux and the X64 Architecture.
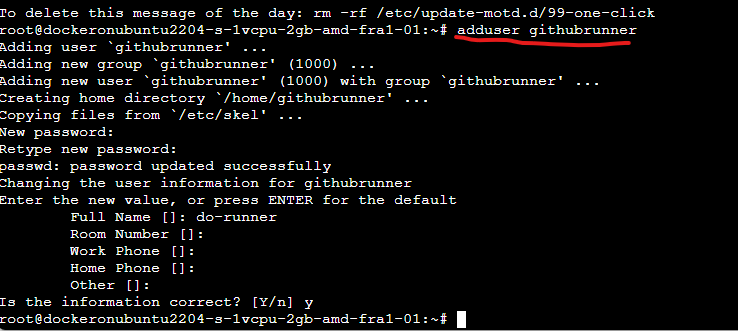
Since the GitHub runner should not run as the root user (the default for DigitalOcean droplets), create a non-root user and add this user to the Docker group.
SSH into your droplet:
2.1 Create a Non-Root User and Add to Docker Group
If you can run docker commands with your current user, you can skip the next step.
If you couldn’t run docker command with a non-root user, before following the Github Runner installation instruction, you should create a user for Github Runner and add it into docker group. Below are the commands to create a new user and set the required permissions:
newgrp docker
sudo su

# Create a password when prompted and save it.
adduser githubrunner

# you will be prompted to add password for this user. Save it somewhere safe.
usermod -aG sudo githubrunner

# Switch to the githubrunner user
su - githubrunner

sudo usermod -aG docker $USER

# Verify that you can run docker commands without sudo now
docker version
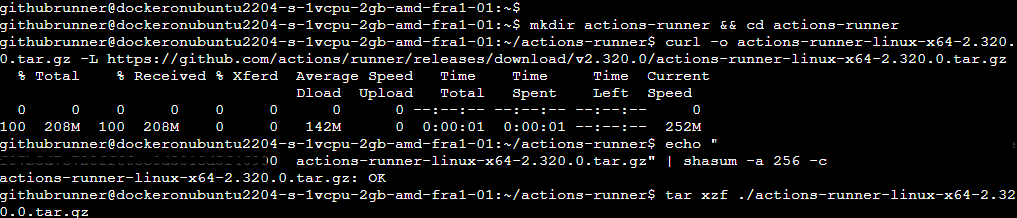
2.2 Install and Configure the GitHub Runner
Now you can proceed with the GitHub Runner setup instructions step by step. Download the runner package, extract it, and configure it using the token provided in the GitHub Actions runner setup page. Note that to choose the correct Operating System and Architecture.
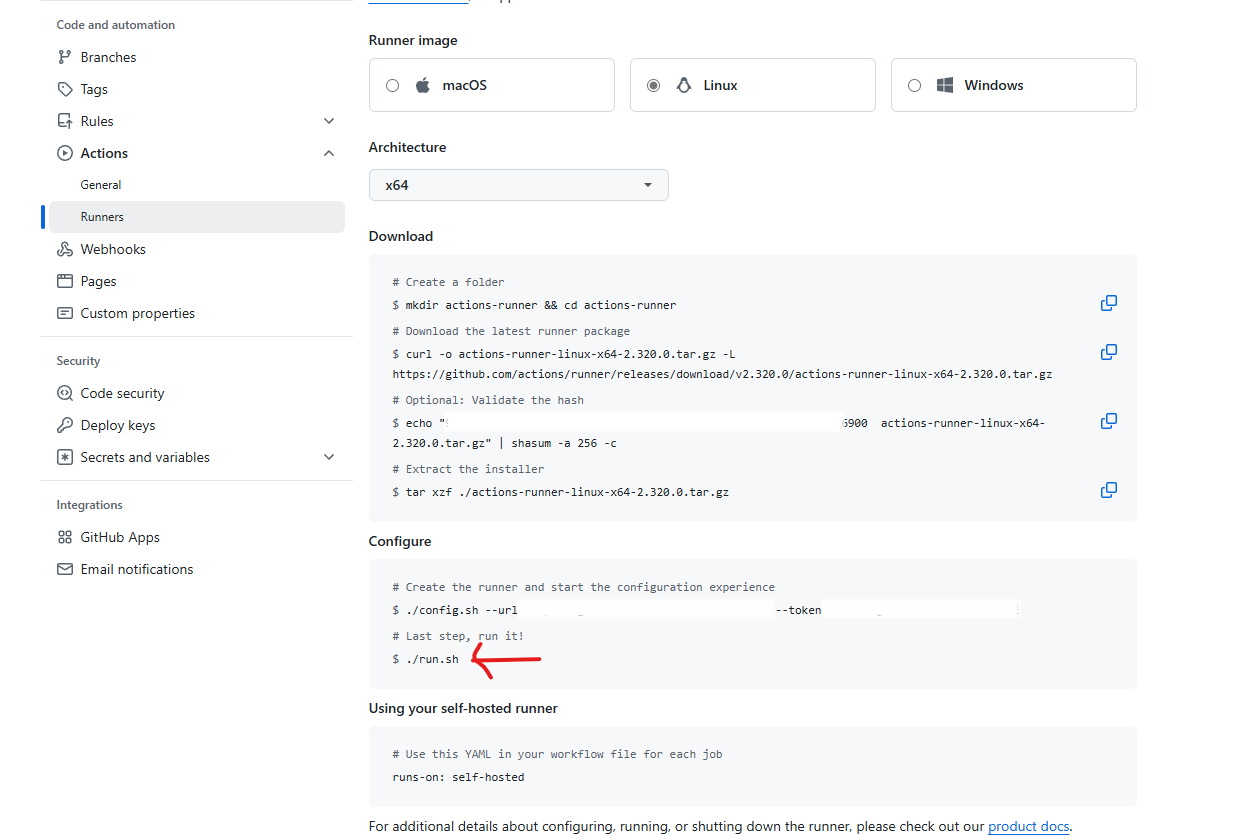
2.3 Run the GitHub Runner
After you run the configuration command ./config.sh --url https://github.com/xxx --token <token>, you will be prompted to Enter the name of the runner group to add this runner to, you can just press Enter to accept the default value.
The next prompt is Enter the name of runner, you can also press Enter to accept the default value.
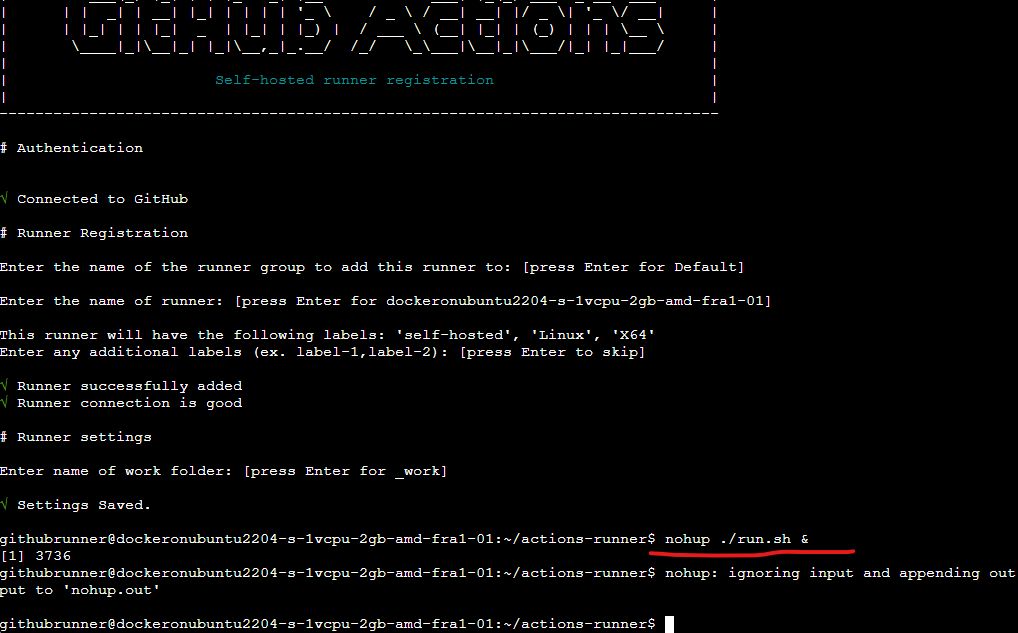
The next prompt is *This runner will have the following labels: ‘self-hosted’, ‘Linux’, ‘ARM64’ Enter any additional labels (ex. label-1,label-2): *, you can add your custom label here or just press Enter to accept the default value.
❗ After executing the configuration command ./config.sh --url https://github.com/xxx --token <token>, instead of running ./run.sh, execute it in the background using nohup:
nohup ./run.sh &
Upon successful execution, check back on the Actions → Runners page, and your newly installed runner should be visible.
With these steps, you can now leverage the power of a self-hosted runner directly from your DigitalOcean droplet, optimizing your GitHub Actions for better control and efficiency.
Enjoyed this article? Support my work with a coffee ☕ on Ko-fi.
