
Introduction
If you work with Docker long enough, you will eventually face this situation:
- You want to migrate data to a new server
- You want to back up a Docker volume before a risky change
- You are decommissioning a container but need to keep its data
- You need to inspect or recover files from a broken container
- You want to move data out of Docker into the host filesystem
Docker volumes are intentionally abstracted away from the host.
This is good for portability and safety, but it also means:
- You cannot easily “just copy” files from
/var/lib/docker - You should not manually poke around Docker’s internal directories
docker cpdoes not work directly on volumes
A common and safe solution is to use a third, temporary container whose only job is to access the volume and extract the data.
This post explains that approach with clear, one-shot commands you can reuse confidently.
The Solution: Use a Third Container as a Data Bridge
The Core Idea
Instead of touching Docker internals, we:
- Start a temporary container
- Mount the target Docker volume into it
- Mount a host directory (or stream data out)
- Copy or archive the data
- Remove the container immediately
Nothing permanent is created. No original container is modified.
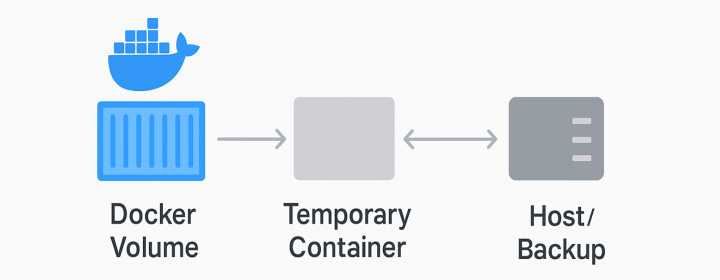
Conceptually, it looks like this:
[Host Directory] <-----> [Temporary Helper Container] <-----> [Docker Volume]
Or as a simple flowchart:
One-Shot Command: Copy Volume Data to the Host (Most Common)
This is the command most people need.
docker run --rm \
  -v my_data_volume:/data \
  -v $(pwd)/backup:/backup \
  busybox \
  sh -c "cp -a /data/. /backup/"
What this command does (step by step)
-
docker run --rmRuns a container and removes it immediately after it exits -
-v my_data_volume:/dataMounts the Docker volume into the container at/data -
-v $(pwd)/backup:/backupMounts a host directory where files will be copied -
busyboxA very small, reliable Linux image with basic tools -
cp -a /data/. /backup/Copies everything while preserving:- permissions
- timestamps
- symlinks
- directory structure
This approach is safe, simple, and widely used in production environments.
One-Shot Command: Create a Compressed Backup (Best for Large Data)
If the volume is large or you want a single portable file, use tar.
docker run --rm \
  -v my_data_volume:/data \
  busybox \
  tar czf - -C /data . > volume-backup.tar.gz
Why this works well
- No intermediate files inside the container
- Streams data directly to the host
- Faster than copying many small files
- Easy to store, upload, or version
Restoring the backup later
docker run --rm \
  -v my_data_volume:/data \
  busybox \
  tar xzf - -C /data < volume-backup.tar.gz
One-Shot Command: Inspect the Volume Interactively (Debugging)
Sometimes you don’t want to copy anything yet, you just want to look.
docker run --rm -it \
  -v my_data_volume:/data \
  busybox sh
Inside the container:
ls -la /data
This is useful for:
- verifying paths
- checking permissions
- confirming what data actually exists
When to Be Careful
Do not extract data while it is actively being written, especially for databases.
Safer pattern:
docker stop my_app_container
# run extraction command
docker start my_app_container
Or use database-native backup tools if consistency matters.
Final Takeaway
Using a third container to extract Docker volume data is:
- Safe (no Docker internals touched)
- Reversible
- Scriptable
- Production-friendly
If you remember only one thing, remember this pattern:
docker run --rm -v <volume>:/data -v <host>:/backup busybox cp -a /data/. /backup/
It is the cleanest way to move data out of Docker volumes without surprises.
Enjoyed this article? Support my work with a coffee ☕ on Ko-fi.
