

Have you ever wanted to add that extra layer of authenticity to your Git commits by signing them with a GPG key? Maybe you forgot to sign a commit and now you’re stuck thinking, “Do I have to rewrite history for this?” Well, yes — but it’s easier than you think. Let’s dive in and get it done.
Why Sign Commits?
First, a quick refresher: Signing commits with a GPG key proves that the commit really came from you. It’s a great way to verify authenticity, especially for collaborative projects or open-source contributions.
Now, on to the fun part — signing an existing commit.
Step 1: Set Up Your GPG Key (If You Haven’t Already)
Before you can sign anything, you need a GPG key. Here’s the quick rundown:
- Generate a key:
gpg --full-generate-key
Follow the prompts to create your key. Choose RSA and RSA, set the key size to 4096, and pick an expiration date that works for you.
- List your keys to grab the ID:
gpg --list-secret-keys --keyid-format=long
You’ll see something like this:
sec rsa4096/ABC123456789DEF0 2024-11-26 [SC]
The ABC123456789DEF0 part is your GPG key ID.
- Tell Git to use this key:
git config --global user.signingkey ABC123456789DEF0
- Commit with signing:
When you make a commit, use the -S flag to sign it:
git commit -S -m "Your commit message here"
This will sign the commit with your configured GPG key.
- (Optional) Enable auto-signing for all commits:
git config --global commit.gpgsign true
Step 2: Add the Key to Your Git Hosting Service
If you’re using a Git hosting service like GitHub, GitLab, or Bitbucket, you’ll want to add your GPG public key to your account so that the platform can verify your signed commits.
You need to list the GPG public key first.
gpg --armor --export ABC123456789DEF0
Copy the output and add it to your Git hosting service. If you use GitHub, you can follow this guide.
- In the upper-right corner of any page on GitHub, click your profile picture, then click Settings.
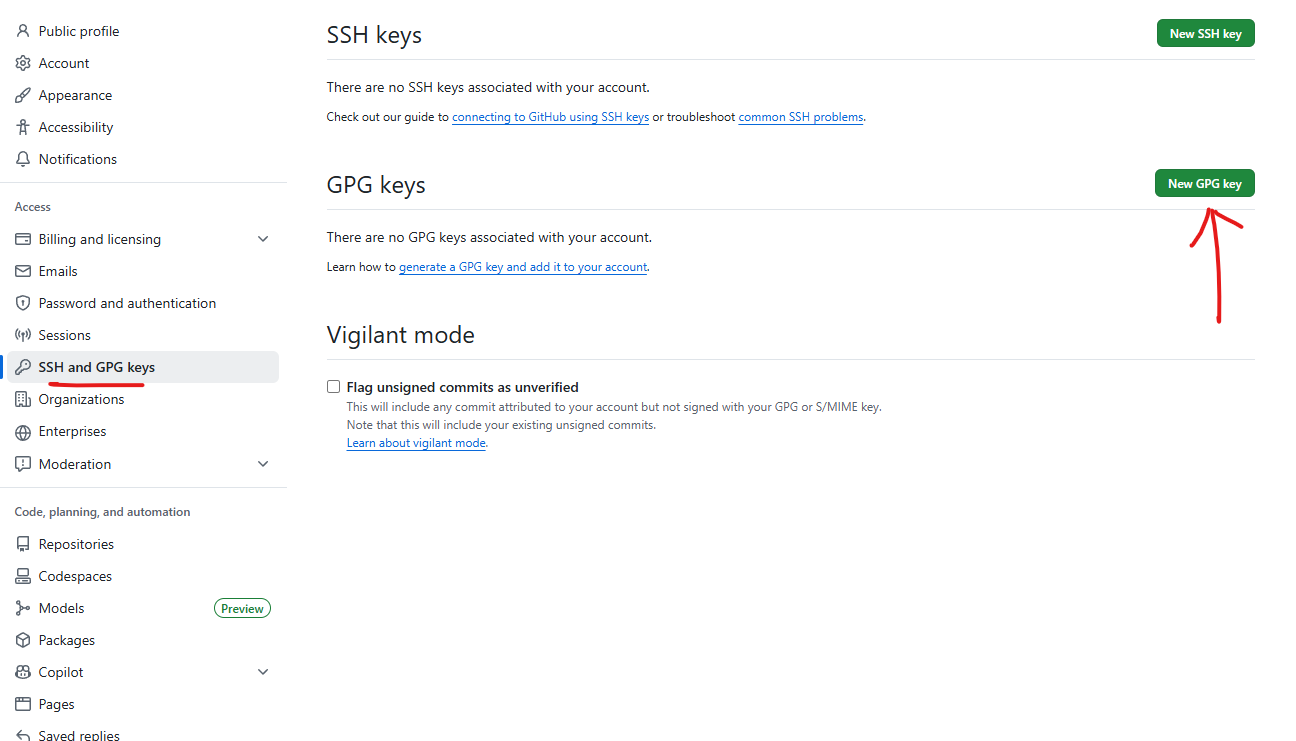
- In the “Access” section of the sidebar, click SSH and GPG keys.
- Next to the “GPG keys” header, click New GPG key.
- In the “Title” field, type a name for your GPG key.
- In the “Key” field, paste the GPG key you copied when you generated your GPG key.
- Click Add GPG key.
- If prompted, authenticate to your GitHub account to confirm the action.
Step 3: Sign All Commits in a Pull Request
Now if the commit you want to sign is part of a pull request (PR) and it’s an earlier commit, you can still use interactive rebase to sign it. However, you’ll need to be cautious, especially if others are working on this branch, as rewriting history can affect shared branches. Assuming it’s safe to proceed, here’s how you can do it:
- Ensure your branch is up to date:
Run git fetch origin to ensure your local branch is up to date with the remote.
- Start an interactive rebase:
Determine how far back the commit is in your branch using git log --oneline, then start an interactive rebase:
git rebase -i HEAD~n
Replace n with the number of commits back to the commit you want to sign.
- Edit the commit:
In the editor that opens, locate the commit you want to sign and change pick to edit.
- Sign and amend the commit:
When the rebase pauses, sign the commit using:
git commit --amend --no-edit -S
- Continue the rebase:
After signing the commit, run:
git rebase --continue
- Force push the changes:
Since this involves rewriting history, you’ll need to force push your branch to the remote PR branch:
git push origin <your-branch-name> --force
Step 4: Verify Your Signed Commit
To double-check that everything worked:
- View the commit signature in the log:
git log --show-signature
You should see something like:
gpg: Signature made Tue Nov 26 12:00:00 2024 UTC
gpg:                using RSA key ABC123456789DEF0
gpg: Good signature from "Your Name <you@example.com>"
- If the commit isn’t signed, go back and make sure your GPG key is properly configured in Git.
Useful Commands
List the GPG Keys
gpg --armor --export ABC123456789DEF0
Wrapping Up
And that’s it! Signing Git commits with GPG keys is a small step that can make a big difference in ensuring code authenticity. Whether it’s for personal projects, team workflows, or open-source contributions, it’s a good practice to adopt.
Enjoyed this article? Support my work with a coffee ☕ on Ko-fi.
