We can easily figure out how to set up Dokku by following the instructions on Dokku website. But for me, I like to host services in docker container as it will bring a clearer structure when it comes to host multiple services in a single machine.
In this post, I will assume that you already had some idea about what Dokku is. If not, you can find more information here.
In the title, I also mentioned another tool called Portainer. Basically it is a management tool of docker container and kubernete cluster with UI. But it is actually much more than that. (I feel I am digging a bit hole while introducing more and more tools).
I will write a series of posts about Portainer in the future. But again, in this post, I will assume that you already had Portainer agent/server installed on your machine.
Now let’s kick off.
- Open portainer page, we can see something like below
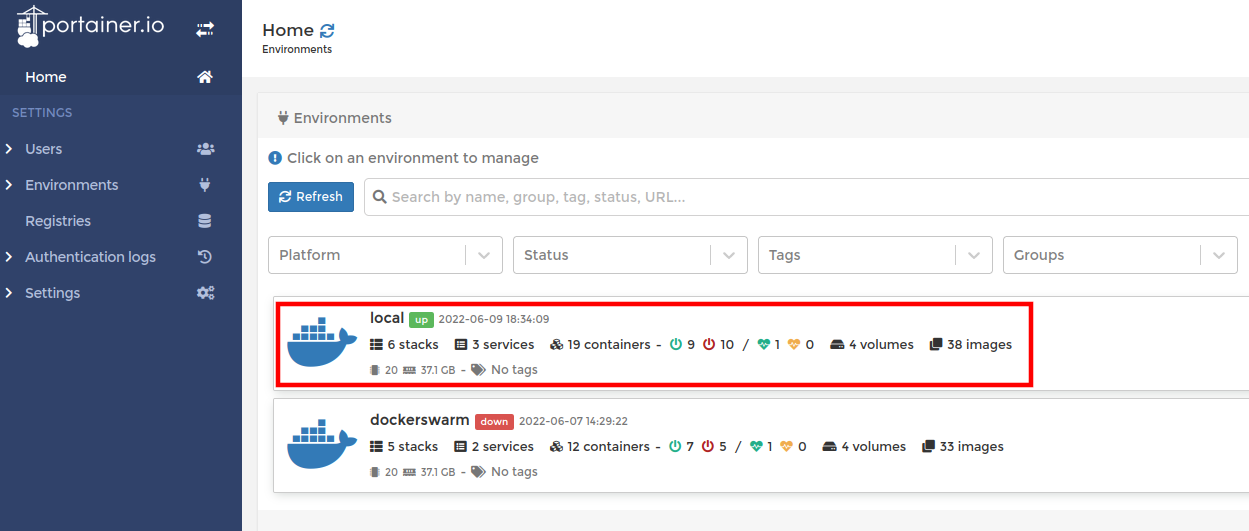
- Click the first item
localon the right panel, we can see more options showing up on the left sidebar as below
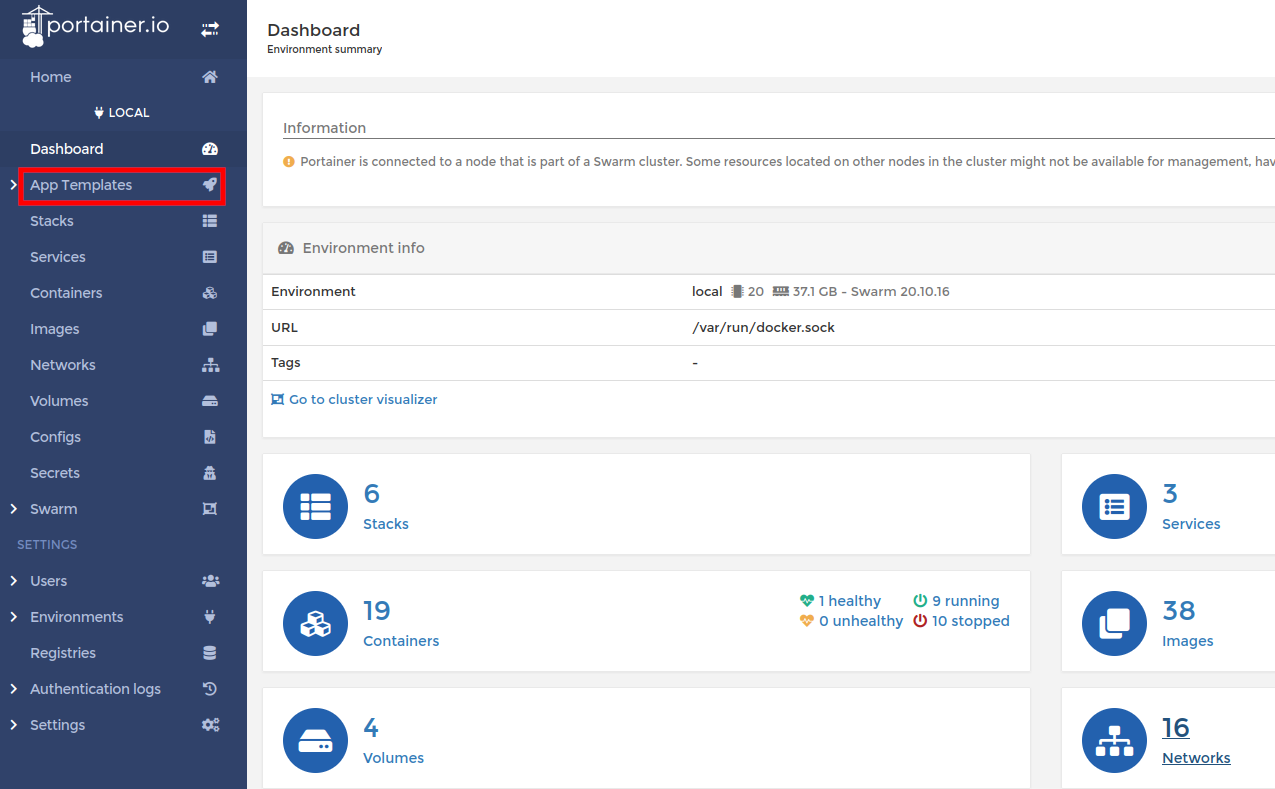
- Click the option App Templates on the left sidebar and toggle on the option Show container templates on the right panel.
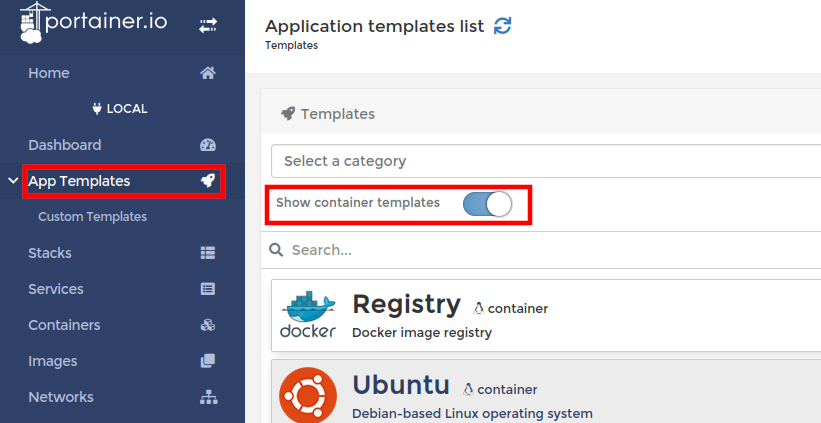
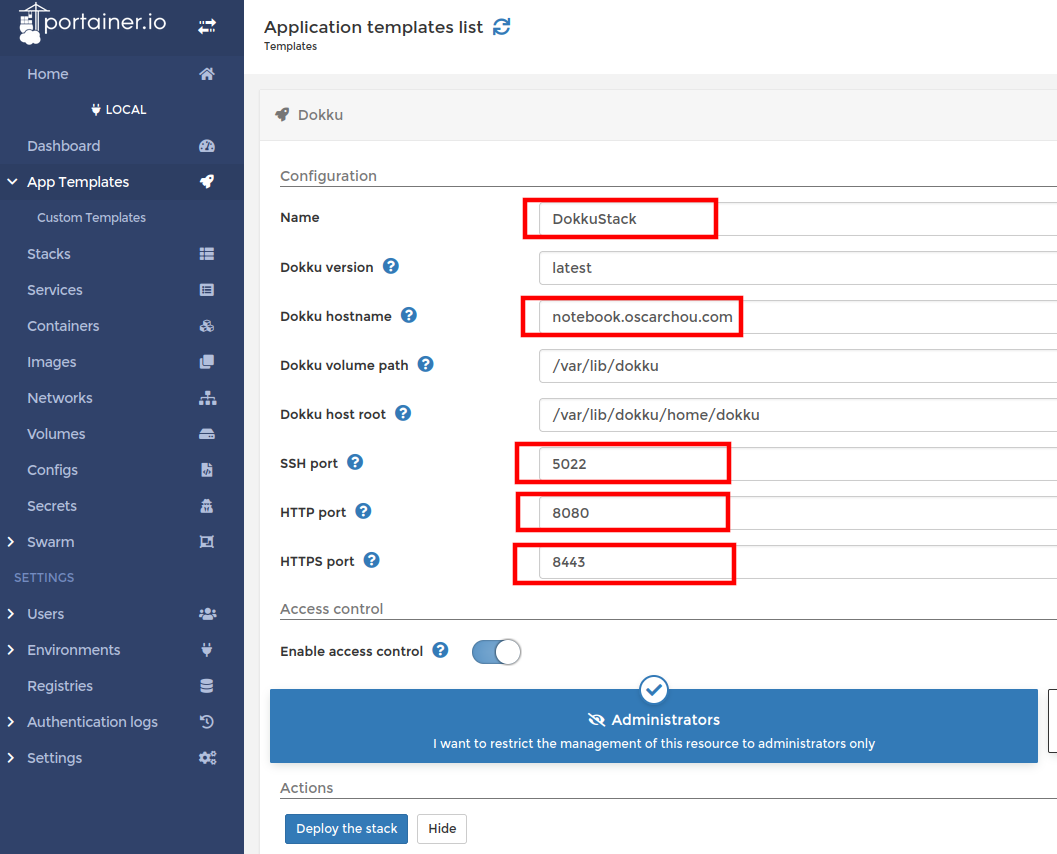
- Scroll down to the bottom, you will find the Dokku template. Click it, the below page will show up.
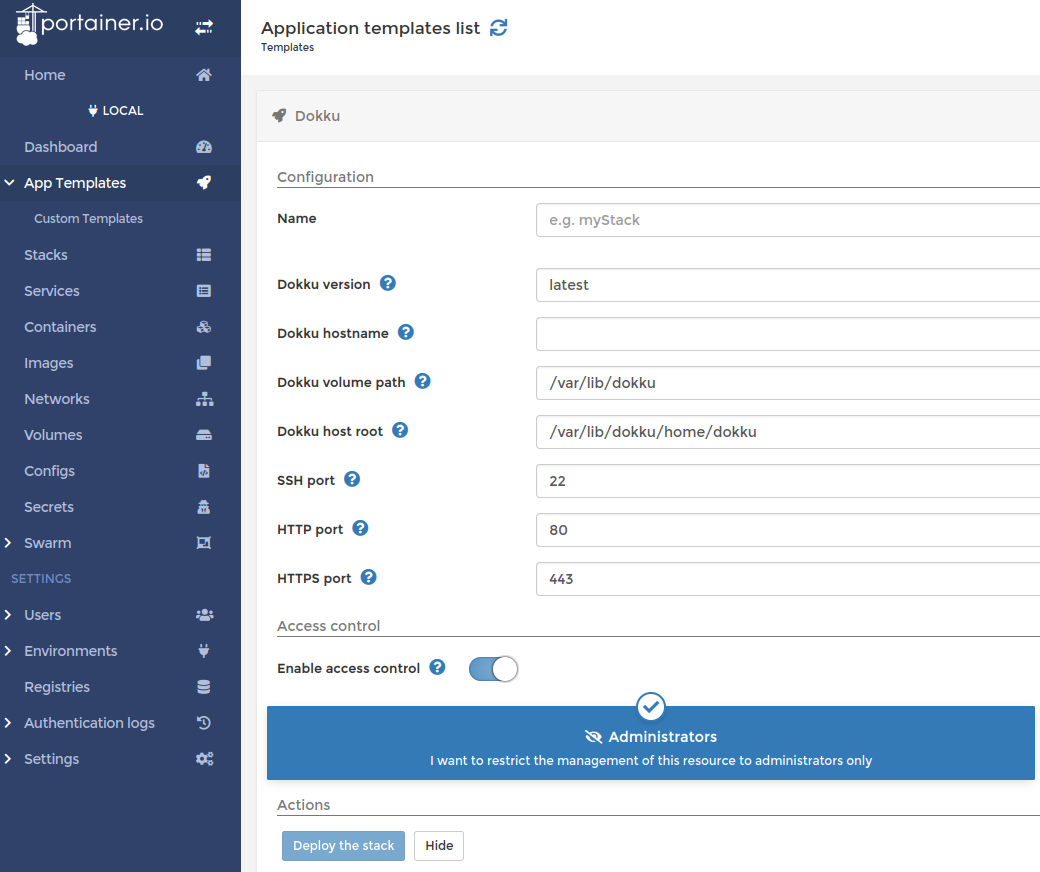
- Now I will explain the configuration one by one.
- Name: must be filled. It is used to identify the stack by Portainer.
- Dokku version: latest is good. While I’m writing the post, the latest version of Dokku is
0.27.5. - Dokku hostname: It is a global hostname to be registered by Dokku.
If you have a domain, you can add it here. But later you need to update the DNS record to point it to the public IP of the machine where the Dokku is installed. If you don’t have a domain, you can add the public IP addres of the machine where the Dokku is installed. - Dokku volume paht: leave it as it is if you dont’ know
- Dokku host root: leave it as it is if you don’t know
- SSH port: If you want Dokku to take control of the remote server,
22is okay. In my case, I may have another router service in front of Dokku service, so I will use5022. - HTTP port: Similar situation as above,
80is the default value, which is good. But I will use8080. - HTTPS port: Same as above,
443is by default. I will use8443.
So at the end, the configuration may look like
- Click the button Deploy the stack and wait until Dokku is deployed. Now if you execute
docker psin the Terminal, you’ll see

Now we have ran up a Dokku container in the machine. There are some fun things about Portainer.
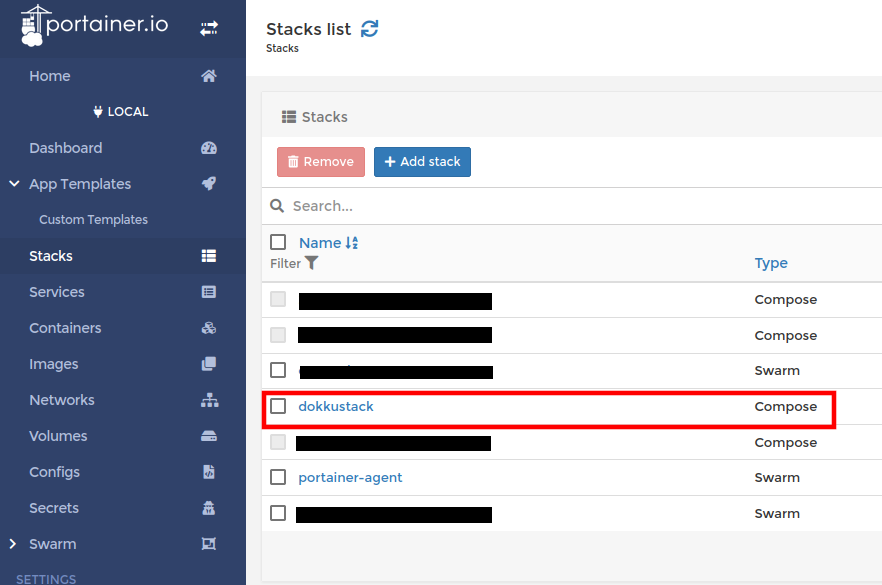
- Next let’s navigate to the option Stacks on the sidebar. And we can see the
dokkustackhas been created.
- Click the
dokkustack, we can see stack detail page. We can basically check everything about dokku container in this page, such as logs, resource usage and configuration.
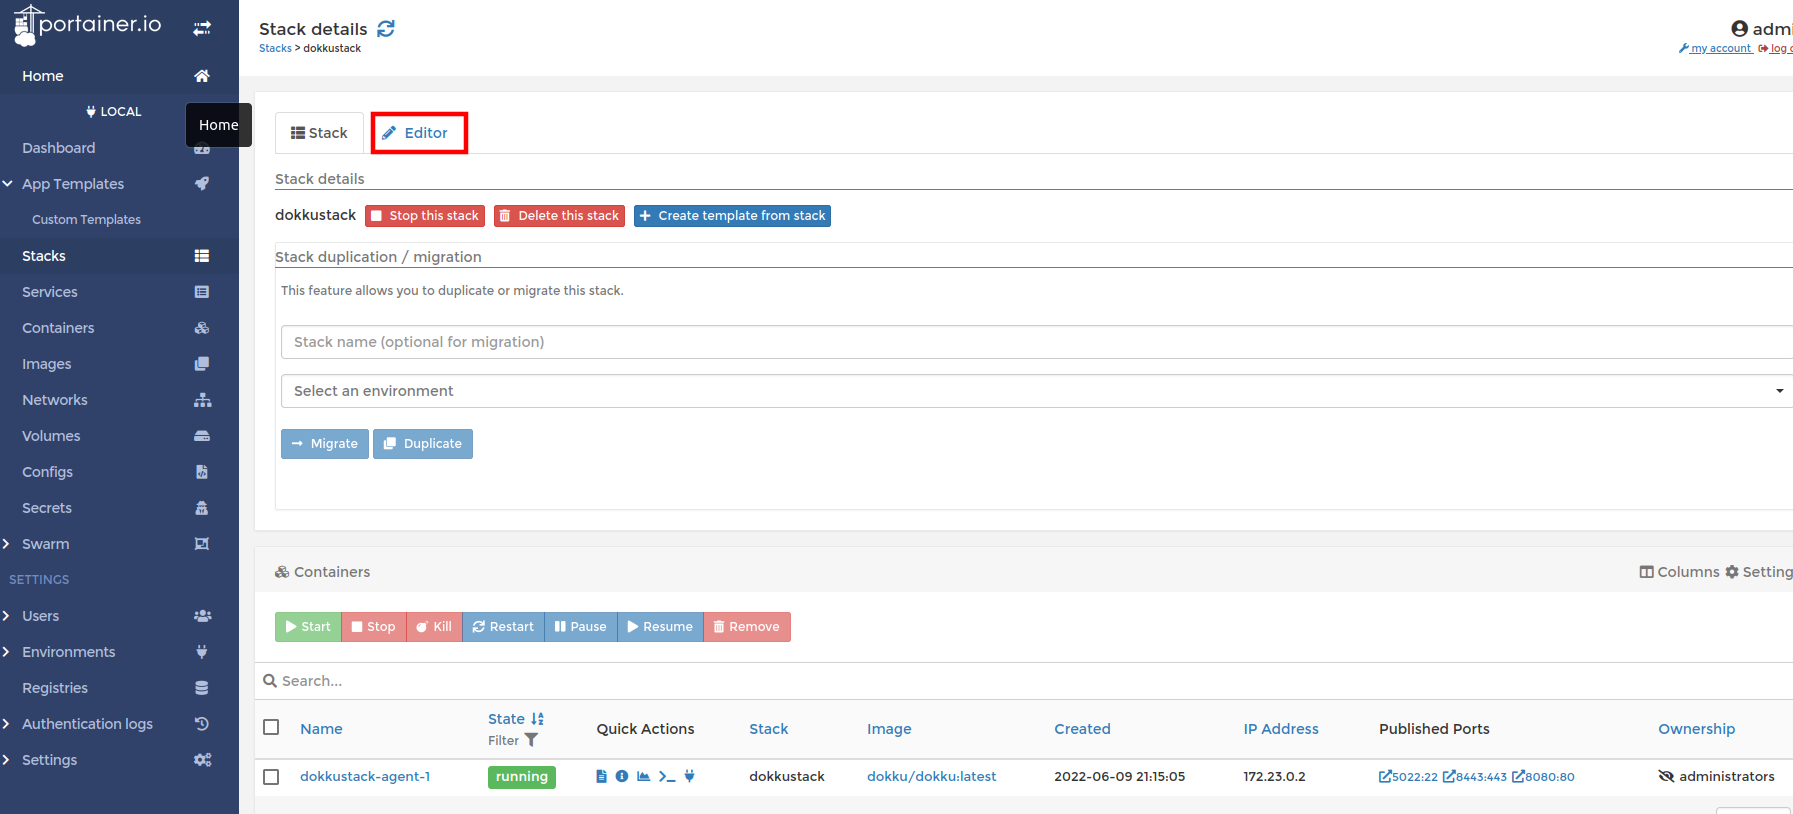
- If we click tab Editor on the top of this page, we can see a plain text of
docker-composefor dokku and its corresponding environment variable setting.
 1version: '3.2'
 2services:
 3  agent:
 4    image: dokku/dokku:${VERSION}
 5    environment:
 6      DOKKU_HOSTNAME: ${DOKKU_HOSTNAME}
 7      DOKKU_HOST_ROOT: ${DOKKU_HOST_ROOT}
 8    volumes:
 9      - /var/run/docker.sock:/var/run/docker.sock
10      - ${VOLUME_PATH:-/var/lib/dokku}:/mnt/dokku
11    ports:
12      - "${SSH_PORT:-22}:22"
13      - "${HTTP_PORT:-80}:80"
14      - "${HTTPS_PORT:-443}:443"
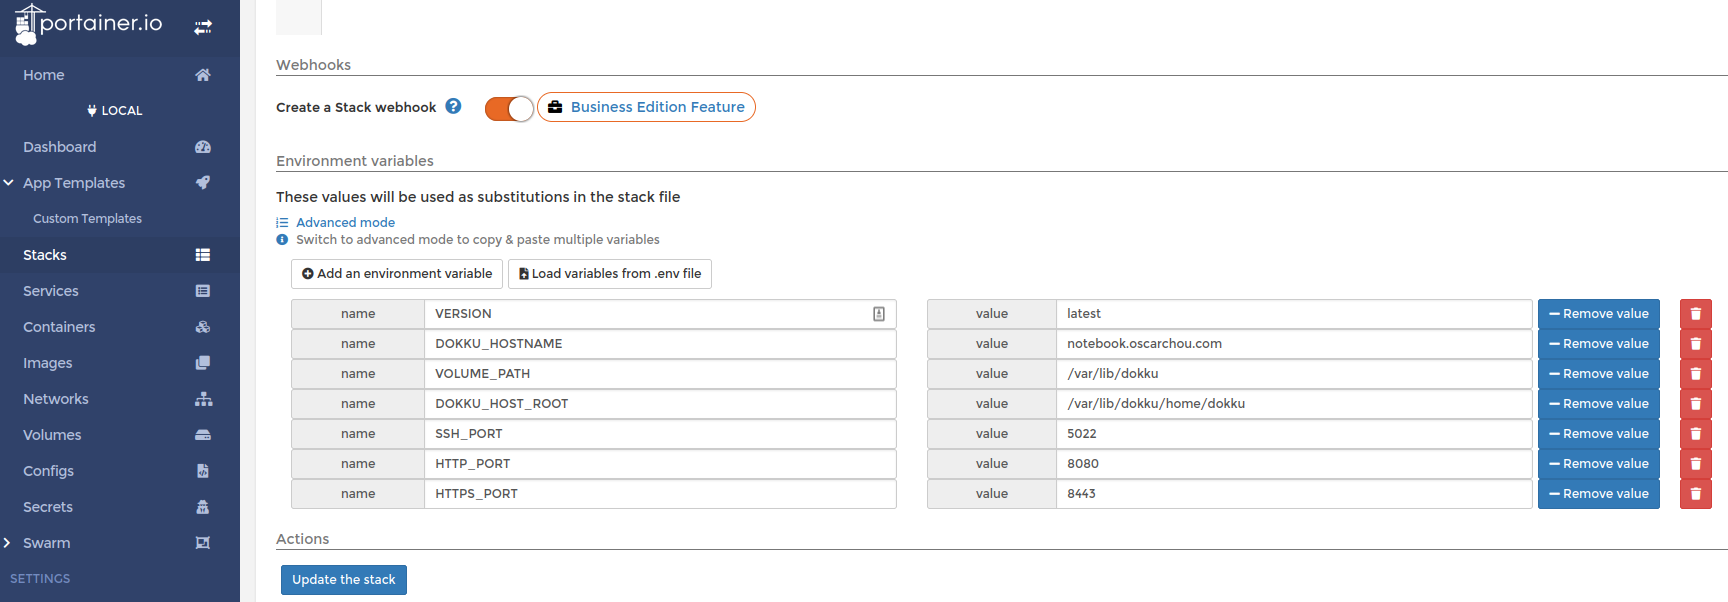
This is a very cool feature. We can change the port or hostname anytime with the button Update the stack. Dokku with the new configuration will run up few seconds later. Note that if the ports are not set with the default values but you want to change them to default values with Update the stack button, you need to remove environment variables of those ports instead of updating the values in Portainer.
In addition, you may notice that the Stack in Portainer is docker-compose configuration with the hardcoded values. Thus, we can manually execute docker-compose up -d and it will work perfectly as well. However, the services grouped by docker-compose will be put in a new docker network. This will bring another issue when a new app is deployed by Dokku as the new app can’t be automatically added into the same network where Dokku is. As a result, the nginx in Dokku can’t route the requests to the real service. The solution is to attach the app to Dokku’s network at its container creation. It can be done by
dokku network:set <app> initial-network <dokkustack_network>
Last thing to note that if you don’t want to use the default port 80 and 443, then you have to set up another reverse proxy, such as nginx or traefik in the front of other services to route host port 80 to container port 8080. However, I do not recommend to set up in this way if you are new to Dokku. It can easily confuse users and mess up the service setup.
If this post helped you to solve a problem or provided you with new insights, please upvote it and share your experience in the comments below. Your comments can help others who may be facing similar challenges. Thank you!

