
Ever spent hours wrestling with an application that seems perfectly fine, only to hit a roadblock that feels completely invisible? Chances are, your application isn’t the problem.
When deploying services on Oracle Cloud Infrastructure (OCI), connection failure is usually not a coding issue. It’s a network issue. Traffic, before it can reach your running code, must pass through a series of security checkpoints, each acting like a protective gate.
The biggest mistake new users make is thinking that opening a port is a single action. In reality, OCI uses a layered security model, and if even one gate is closed, the connection fails.
Understanding and systematically checking these layers is the key to reliable deployment on OCI. This guide will walk you through the essential, step-by-step process to ensure your port is fully exposed and reachable.
The Multi-Stage Pipeline of Connectivity
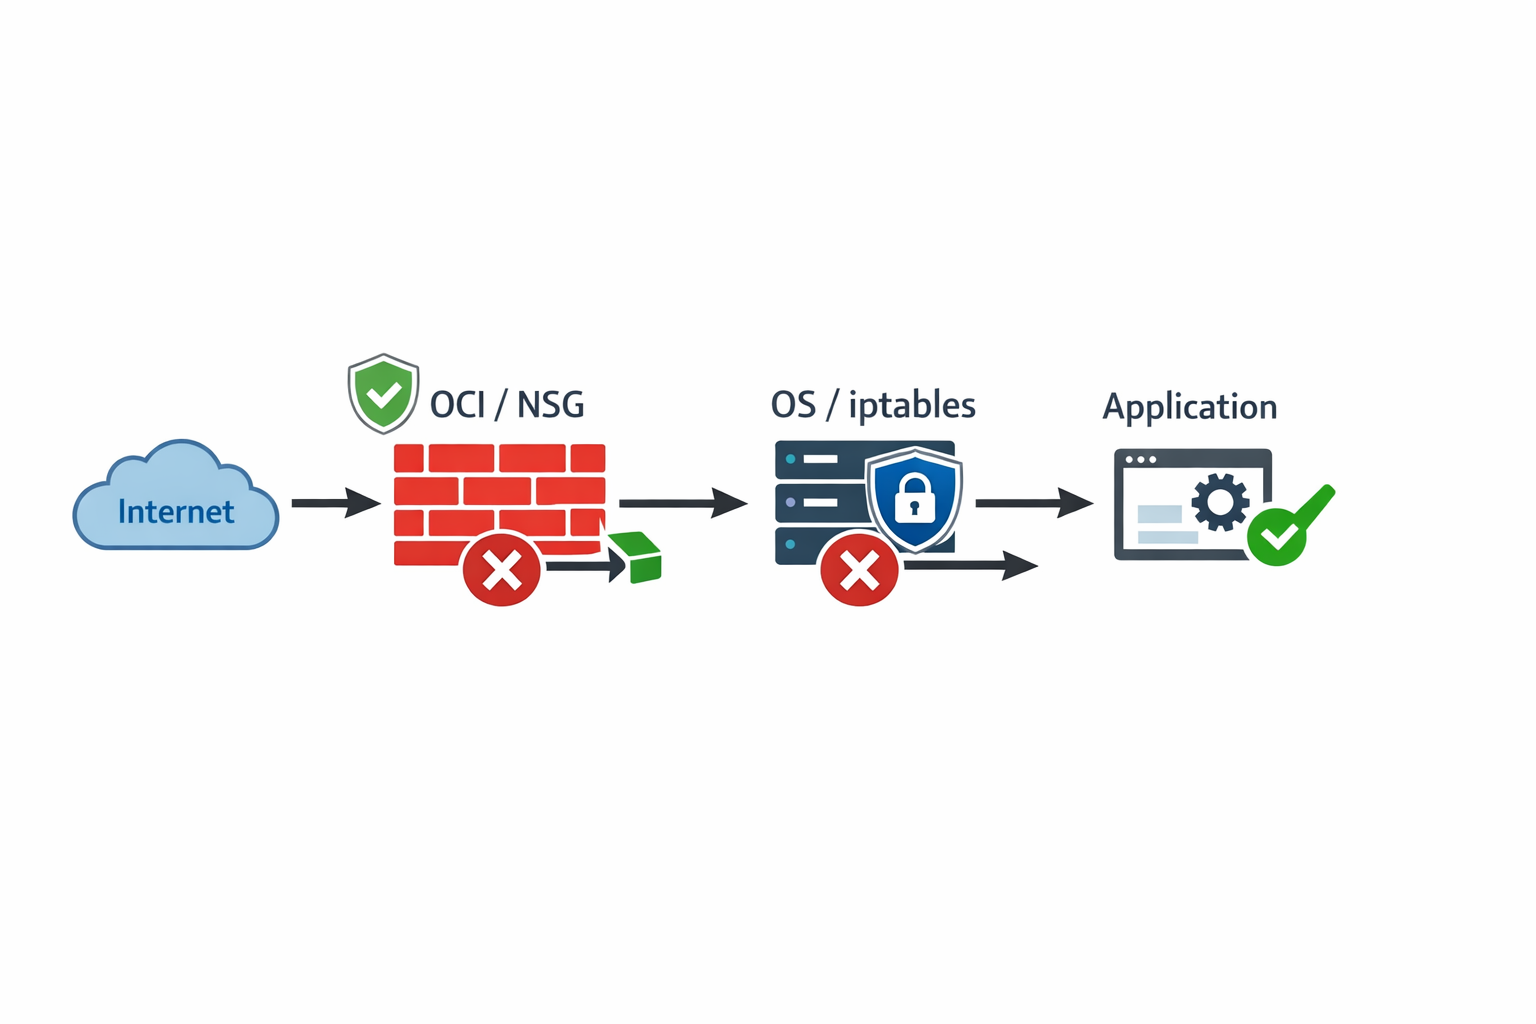
For external internet traffic to successfully reach a service on your OCI VM, it must pass through a sequence of checks, moving from the outside world inwards.
As you can see, we have four potential failure points (OCI Network Firewall: NSG/Security List, VM Subnet Boundary, OS Firewall, and the Application itself).
If the traffic is blocked at any step, the connection will fail. We must verify these layers in strict order, always starting from the outermost layer (OCI).
Step 1: The OCI Network Firewall Layer (The Cloud Gate)
This is the outermost security guard, controlled entirely by OCI. It determines if any traffic from the internet is allowed to even reach your Virtual Cloud Network (VCN) subnet.
In OCI, this control is managed by Security Lists (attached to the subnet) or Network Security Groups (NSGs) (attached to the instance’s network interface card, or VNIC).
You must add a precise Ingress Rule to allow the necessary traffic flow.
Action: Configuring the Ingress Rule
- Where to look: Navigate to the Networking service in the OCI console. Check both the Security List associated with your VCN subnet and the NSGs attached to your instance.
- Source CIDR:
0.0.0.0/0(This means “from anywhere on the internet”). - IP Protocol:
TCP(Standard for web services and most applications). - Destination Port Range:
80,443(The specific ports your service uses, e.g., HTTP and HTTPS). - Source Port Range:
All(This is crucial—see the pitfall below).
The Single Most Common OCI Pitfall: Source vs. Destination Ports
This mistake trips up nearly every beginner. When a client on the internet connects to your server:
- The client uses a random, temporary port (an ephemeral port, e.g., 52341) as its source port.
- Your server is always listening at the fixed destination port (80 or 443).
If you mistakenly limit the Source Port Range to 80 or 443 in the OCI rule, the packet will be dropped because the client’s actual source port is random, not 80 or 443.
The rule must always allow the Source Port Range to be All (or 0-65535), while strictly defining the Destination Port.
Step 2: The VM Operating System Firewall Layer (The Local Gate)
Even if OCI allows the traffic through the cloud boundary, the operating system running inside your VM has its own default security policy, which is almost always to reject incoming connections.
On Linux, this is managed by tools like iptables or frontends like ufw. You must explicitly tell the OS to accept the connection on port 80 or 443.
Action: Applying the iptables Rule
To allow incoming TCP traffic on port 80 or 443, you must insert an ACCEPT rule into the INPUT chain:
sudo iptables -I INPUT -p tcp --dport 80 -j ACCEPT
sudo iptables -I INPUT -p tcp --dport 443 -j ACCEPT
Critical Step: Persistence is Non-Negotiable
Firewall rules entered manually via the command line are volatile. They disappear immediately upon reboot or network service restart. You must save the ruleset for them to be permanent.
For systems using netfilter-persistent:
sudo netfilter-persistent save
(Always consult your specific Linux distribution’s documentation for the exact save command.)
Step 3: The Application Binding Layer (The Listening Ear)
This is the final checkpoint. Opening ports in both the OCI and OS layers is insufficient if the application itself isn’t configured to accept external traffic.
If your application is coded to bind only to 127.0.0.1 (the loopback address), it means it is only listening for calls originating from within the machine itself. It will ignore all external network traffic.
How to Check Binding Status
Use ss (a modern replacement for netstat) to confirm which address your service is actively listening on:
sudo ss -tulnp | grep 80
What you must see:
The output must show the service listening on 0.0.0.0:80 or 0.0.0.0:443.
0.0.0.0: This universal address means “listen on all available network interfaces,” making the service reachable from any source.
What indicates failure:
If the output shows 127.0.0.1:80 or 127.0.0.1:443, the application is bound too tightly. You must modify the application’s configuration file (environment variables, service configuration object, etc.) to explicitly bind to 0.0.0.0 and then restart the service.
The Diagnostic Funnel: A Structured Approach to Testing
Never test external access first. Always work methodically from the inside out.
Phase A: Internal Validation (Inside the VM)
First, confirm the application and local OS are ready to receive traffic.
- Test Loopback: This confirms the application is running locally.
curl http://127.0.0.1:80
- Test Private IP: This confirms the application is bound to the correct interface.
curl http://[private-ip-address]:80
If both of these local tests succeed, the problem is external. Proceed to Phase B.
Phase B: External Validation (From your Laptop)
Use a completely separate machine to test the connection via the public IP address. The telnet utility is the gold standard tool here.
telnet <public-ip-address> 80
You should see a successful connection message. If it fails, the issue is still in the OCI or OS firewall layers.
The Master Debugging Checklist for OCI
To ensure maximum efficiency, use this strict workflow:
- App Binding: Run
ss -tulnp | grep 80. Does it show0.0.0.0:80? (Fix app config if not.) - OS Firewall: Run the
iptablesACCEPT rule and save persistence. (Fix OS firewall if not.) - OCI Firewall: Verify the NSG/Security List. Is the rule present for TCP 80 from
0.0.0.0/0with Source Port set toAll? (Fix OCI console if not.) - External Test: Run the
telnet <public-ip-address> 80test from a clean external network.
By treating your OCI deployment as a sequential pipeline, you transform complex networking debugging into a highly predictable, step-by-step process.
Enjoyed this article? Support my work with a coffee ☕ on Ko-fi.
