
Nov 2025 Update
I originally wrote this post a couple of years ago to document my workflow for creating self-signed certificates.
Since then, I’ve built a small online tool called OneClickTLS that lets you generate TLS and mTLS certificates instantly in your browser.
Just enter your Common Name (CN) and Subject Alternative Names (SANs), and it will give you ready-to-use certificate and key files.
This post will walk you through how to generate your own TLS certificate with tool cfssl. cfssl is one of cloudflare projects, which has over 7k stars in GitHub.
First of all, let’s download the latest binary. Currently it’s on v1.6.1 while I’m writing this post.
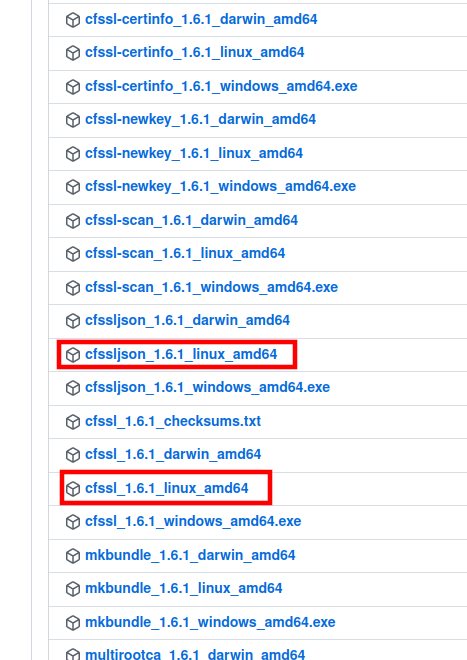
In the release page, you can see there are many binaries with different platform and arch. For this tutorial, we will just need to download two binaries cfssl_<version>_<platform>_<arch> and cfssljson_<version>_<platform>_<arch> as shown below. Choose the one that fits your platform and arch.
You can either put the downloaded binaries in your /bin folder or configure the environment path. That depends on your system. Just make sure that you run execute these two binaries like below.
cfssl version

# Output
Version: 1.6.1
Runtime: go1.12.12
Next, create a directory for keeping the certificates that we are going to generate, like certs. And run the below command under the directory certs.
cfssl print-defaults csr | cfssl gencert -initca - | cfssljson -bare test-ca
Note that test-ca is the name of the custom certificate. You should see the below output after running the command.
2022/08/03 22:16:28 [INFO] generating a new CA key and certificate from CSR
2022/08/03 22:16:28 [INFO] generate received request
2022/08/03 22:16:28 [INFO] received CSR
2022/08/03 22:16:28 [INFO] generating key: ecdsa-256
2022/08/03 22:16:28 [INFO] encoded CSR
2022/08/03 22:16:28 [INFO] signed certificate with serial number 432948283564456421094793083313062574821332371132
As a result, three new files, test-ca.csr, test-ca-key.pem, and test-ca.pem will be generated.
Add another file called cfssl.json with the below content under the directory certs.
{
  "signing": {
    "default": {
      "expiry": "87600h",
      "usages": ["signing", "key encipherment", "server auth"]
    }
  }
}
Last step, we need to run the below command to generate certificate and key file against CA certificate. In our case, it’s test-ca.pem.
echo '{}' | cfssl gencert -ca=test-ca.pem -ca-key=test-ca-key.pem -config=cfssl.json \
    -hostname="test.example.org,localhost,127.0.0.1" - | cfssljson -bare server
The last part of the command cfssljson -bare server means that the new certificate and key file will start with server.
So now, we have finished generating the custom certificates. The final directory structure of /certs should look like:
├── cfssl.json
├── server.csr
├── server-key.pem
├── server.pem
├── test-ca.csr
├── test-ca-key.pem
└── test-ca.pem

0 directories, 7 files
Normally we need custom TLS certificates when we want to configure some services with TLS enabled. In that case, you may have the option to upload few files. Typically, test-ca.pem is for the CA Cert option, server.pem is for the Certificate option, and server-key.pem is for the key file option.
Enjoyed this article? Support my work with a coffee ☕ on Ko-fi.
